Goat Meatballs with Wilted Slaw

Just in time for the Superbowl, I’ve got a surprise recipe that no one will see coming at your party. Goat Meatballs filled with slow cooked onions, celery, along with roasted peppers & garlic. The trick to making these really awesome if finding meat that has been ground only once, not twice. The meat should look loose with curly pieces of fat and meat; not minced and packed together. Otherwise your burgers are going to be too tight when you make them. We’re looking for a fall-apart meatball that literally breaks apart in your mouth so you can taste all the veggies we are packing inside. So no over-mixing folks; and gentle cooking.

To keep the flavor profile rich but not overly “goaty” you will be using 1/2 ground goat and 1/2 ground burger (standard 80/20 blend). Both from local farms, both single grind. You’re also looking for goat meat from young goats which tends to be more mild. For this week’s test, I used WeatherHand Farm’s (Durham Farmers’ Market & Greensboro Farmers’ Curb Market) ground goat meat and Cohen Farm (Midtown Raleigh Farmers’ Market) ground beef.  Most all of our local farmers’ markets have goat available now so you shouldn’t have a difficult time finding it at all.

I’ll be using the roasted Italian peppers & garlic along with slow-cooked sweet yellow onions and local celery from summer’s harvest that are in the freezer for this recipe. You can substitute green garlic in this recipe for a little different flavor that is wonderful as well. I put some in the freezer last year mixed with some olive oil and it has held up pretty well.  This recipe is not overly spicy so it will be fine for kids. Feel free to amp it up with your own additions or serve them up with marinara sauce or slow-cooked fennel & onions. Any leftover meatballs can be broken up for lasagna, tacos or used for sliders or a sub as a second meal.

A quick note on locally grown celery. It used to be difficult to find but this past year I found it at several markets and all of it was grown quite well by sustainable farms in our area with beautiful stalks and lush green tops. The tops on the local celery represent easily up to 30% of the plant you purchase so plan to use them in a raw salad with corn or dehydrate them to use in soups, stews and sauces for tons of flavor. This Quinoa Salad with fresh Celery Leaves, Corn and Berries is really nice too.


Goat Meatballs
Ingredients

  • 1 lb ground goat (single grind)
  • 1 lb ground beef (single grind 80/20)
  • 1 large egg, lightly beaten
  • 2 teaspoons roasted garlic smashed (or raw green garlic minced)
  • 1/4 cup dehydrated sungold tomatoes (with herbs preferable)
  • 2 tablespoons roasted Italian peppers, chopped
  • 2 tablespoons roasted onions
  • 1 tablespoon slow cooked celery or 2 teaspoons dehydrated celery leaf
  • 1 tablespoon aged balsamic vinegar
  • 1/2 teaspoon concentrated Liquid Tamarind Paste Concentrate
  • 1 tablespoon dried parsley
  • 1 teaspoon fresh rosemary, finely chopped
  • 1/2 teaspoon fresh thyme, finely chopped or 1 teaspoon dried French thyme
  • 1/4-1/2 teaspoon Mesquite & Apple Wood Smoked Peppercorns
  • 1 teaspoon Himalayan salt (fine grind)

Preparation

  • Beat your egg first in a large bowl.
  • Add all of the ingredients except the meat and blend them together.
  • Gently break the meat into the veggies and spices and blend just until it’s incorporated without mashing the grind too much.
  • Form your meatballs into a size that can be easily eaten in one or two bites and set aside on parchment paper on a baking sheet with edges (jelly roll pan).
  • Bake at 350F until cooked through. About 10 minutes.
  • Alternately, use a cast iron pan to cook on the stove top or grill top, using medium heat. Turn as needed to cook  for about 7-10 minutes. A lid can be used to retain heat and splatter.

Notes

  • You can use goat as a substitute in many recipes that call for beef making it more heart-healthy and acceptable for folks that don’t eat beef specifically. It works well with many different spices and using slow cooking methods it is more flavorful in many dishes that call for a lot of spice.
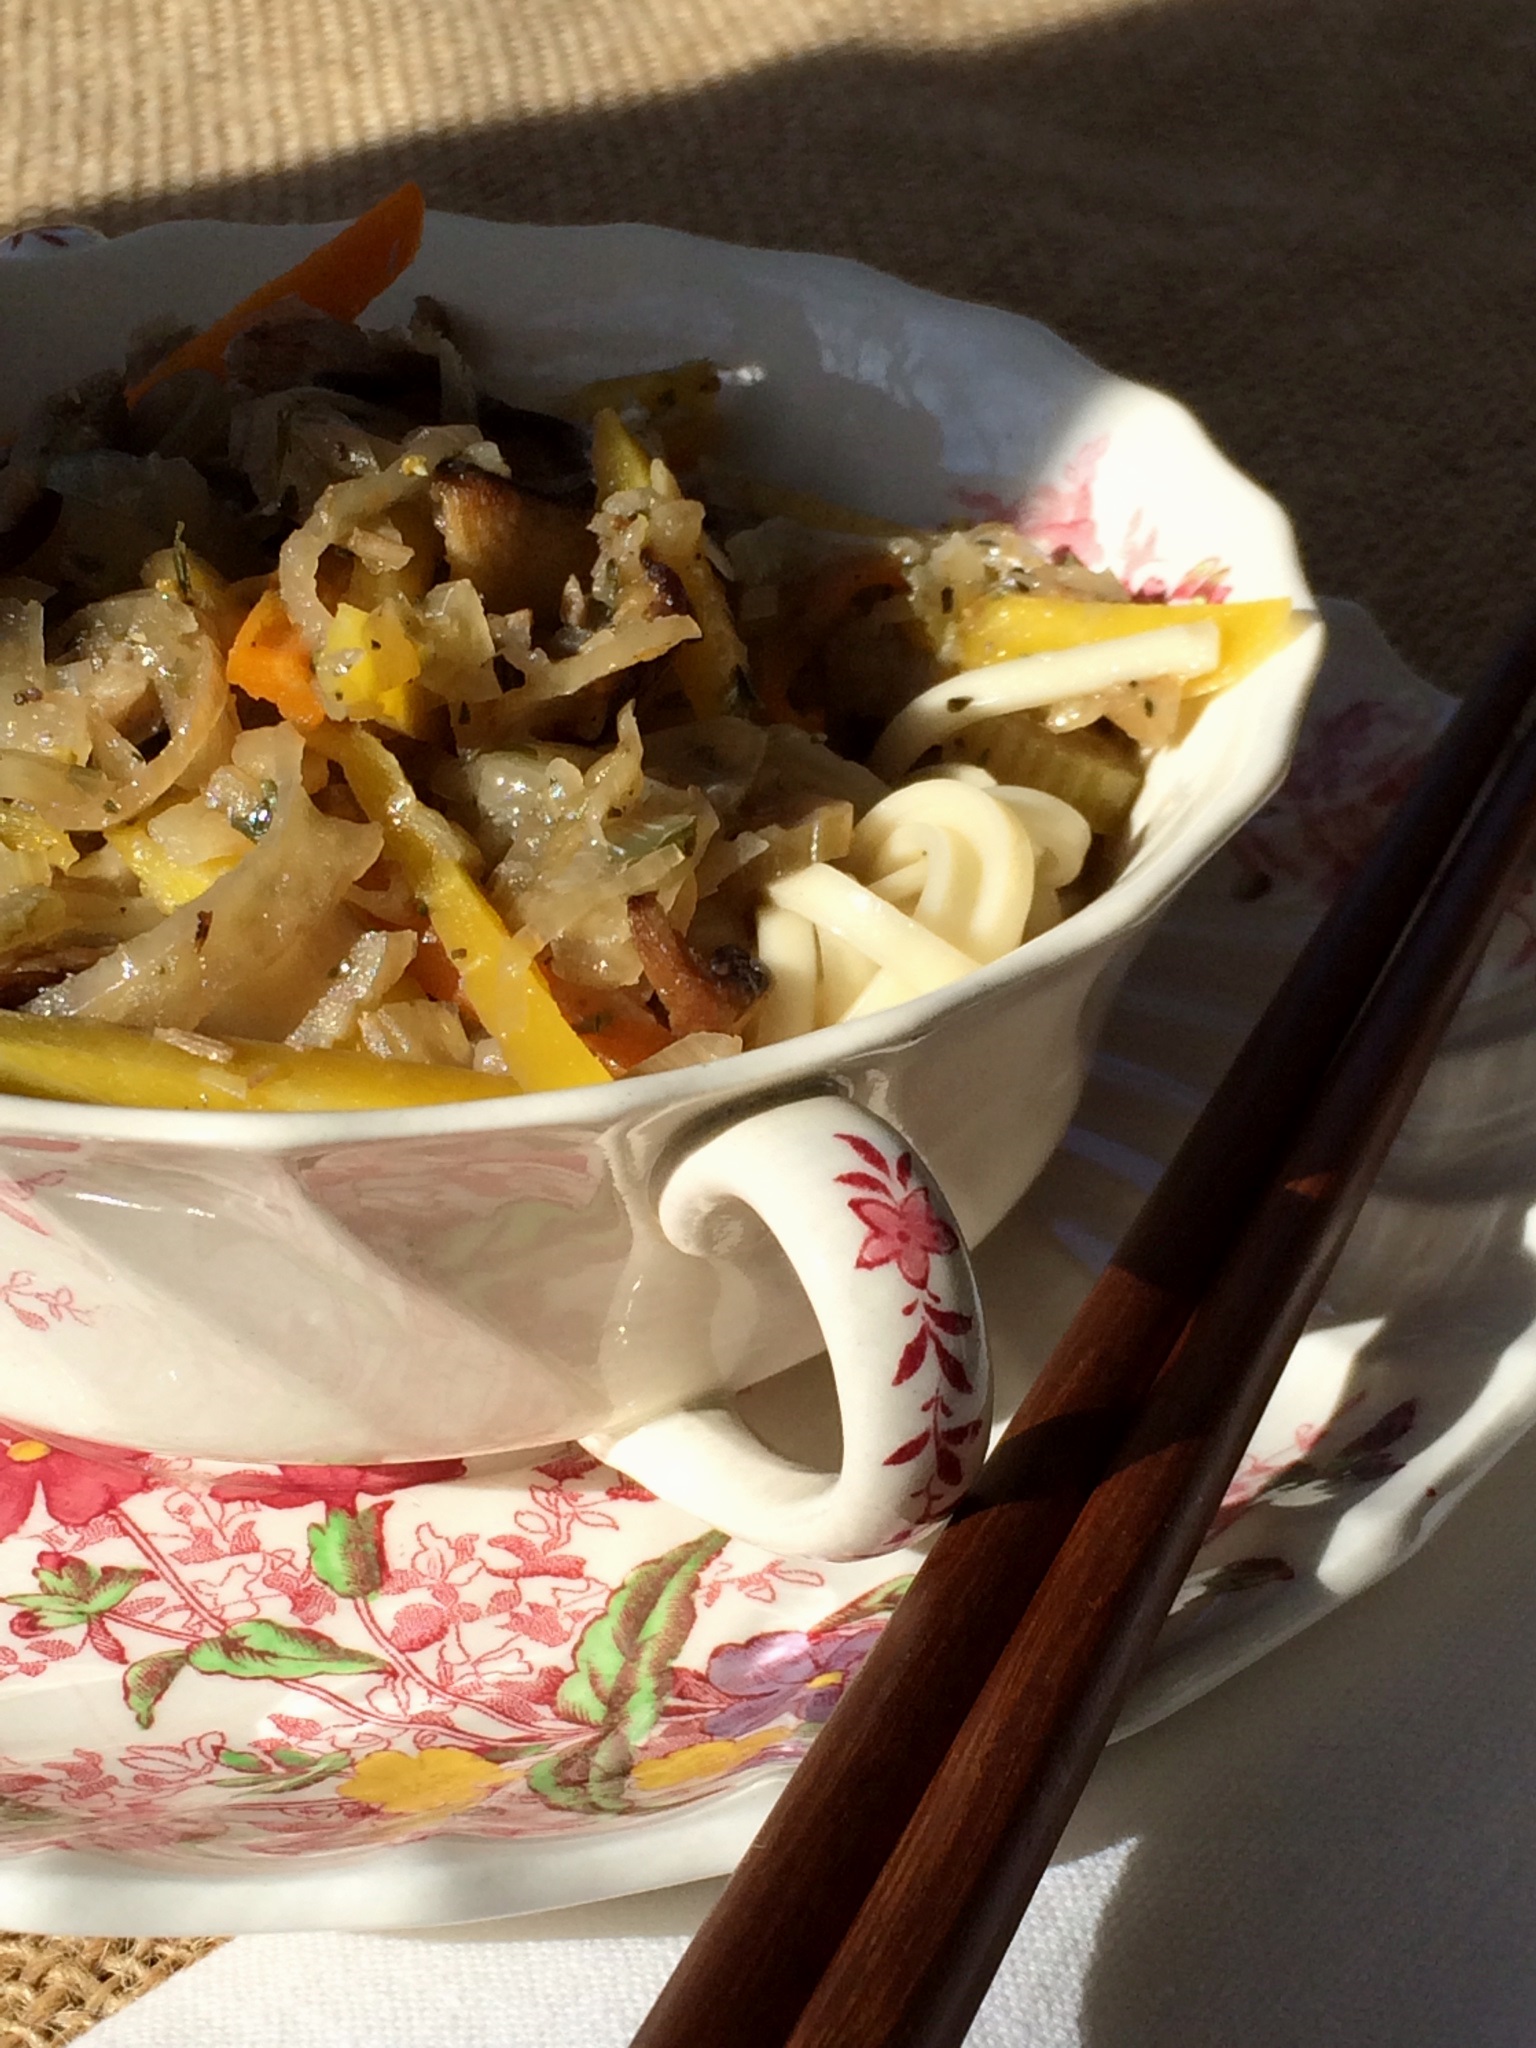
  • For this recipe I gently warmed a simple Slaw Salad in a heavy pan on the stove top with some olive oil (you can add just a touch of local mustard and white balsamic vinegar at the end of warming) for just a couple of minutes on medium high. This will leave the slaw crunchy but just a tad wilted. Almost like a stir-fry but don’t cook it that long.
  • Alternately, I think these might be fun served with the Raw Butternut & Apple Salad which is a bit sweet and would contrast the meat.  I think I might eliminate the ginger and the maple syrup when making it for the meatballs. Or the Winter Greens & Turnip Salad minus the black-eye peas, maple syrup and ginger should also work well.
Posted in Beef, Fall, General, Gluten-Free, Nut-Free, Recipes, Seasonal Eating, Second Harvest, Snack, Winter | Tagged , , , , , , , , , , , , , , , , | Leave a comment

Roasted Winter Squash Soup

Some of my most favorite fall trips to Boone have included  trips to the Watauga Farmers’ Market to pick out winter squash and apples. Every year I make it a point to try new varieties of both in this soup so it turns out just a little different each year depending on what’s available when I make the trip. I’ve also used homemade pear butter but you can substitute some apple butter or find a local product to add to the recipe.

My first taste of Squash Soup came from Southern Season’s Weathervane Cafe several years ago. It was silky smooth with incredible undertones of delicate spices. Up until that point, I had rarely had winter squash and it was generally over-baked and stuffed with so much sugar that it barely resembled a vegetable. Not the best recommendation for a healthy soup recipe. This one relies on NC sustainable/organic farm products like baby ginger, hot peppers, and maple syrup from Maple Creek Farm in Burnsville. (Maple Creek is no longer producing due to weather / climate change. Please go to their site to read their story.)

The other variations that you can make to this soup include using chicken broth, or adding  peanut butter and spicing it up with some dehydrated local hot peppers to contrast the maple syrup. Lastly, I’ll comment on salt. This recipe calls for some “bright” salts like Murray River and Himalayan Pink that compliment the fall squash well without overpowering their delicate flavors. I really recommend keeping some of these on hand for cooking vegetables.

This recipe makes a good size pot of soup and you can freeze any extra you don’t eat right away.


Roasted Winter Squash Soup

Ingredients

  • 1 lb of acorn squash, washed, cut in half, seeds removed
  • 1 lb pumpkin squash, washed, cut into 8 sections, seeds removed
  • 1 lb butternut squash, washed, cut in half, seeds removed
  • olive oil
  • 32 oz vegetable broth
  • 8-12 oz low-fat coconut milk
  • 1 tablespoon dehydrated apples, chopped or 1/4 cup raw apples, finely chopped
  • 1 tablespoon shallots, finely chopped (or 1 teaspoon dehydrated)
  • 2 teaspoons roasted garlic, finely chopped
  • 2 oz roasted onion, finely chopped
  • 2 oz pear or apple butter
  • 1-2 tablespoons maple syrup
  • 1 teaspoon cumin powder
  • 1/2 teaspoon Aleppo chile powder (mild)
  • 1/4-1/2 teaspoon Mild Chimayo Chile powder
  • 1/4 teaspoon Cayenne pepper or some portion of a local hot chili from the market
  • 1/2 teaspoon ground Ceylon cinnamon
  • 1/4 teaspoon ground nutmeg
  • 1 tablespoon fresh baby ginger, minced (can be frozen from the summer/fall season)
  • 1/2 -1 teaspoon Murray River Flake salt
  • 1/2-1 teaspoon Himalayan Pink salt
  • 1/4 – 1/2 teaspoon fresh ground pepper (Four Peppercorn Blend)
  • Optional – 1/8- 1/4  teaspoon very hot local pepper like Picante or Espelette
  • Optional – Big Spoon Roasters Peanut Butter – add as much as you like


Preparation

  • First, bake all of the squash without oil at 350F until it’s finished cooking, which should be about an hour. All of  it should be placed on a baking sheet or in a dutch oven with parchment paper on the bottom of the sheet or pot. Turn the halved squash upside down so the cut portion is flat against the bottom. For the slices of pumpkin, just lay them on their sides on the parchment. Cover all of the squash with a lid or foil so the moisture is sealed inside. We’ll need that for the soup.
  • After cooking all of the squash, scrape the flesh from the skin. Measure/weigh out the squash you need for the recipe and add it to a soup pot. Refrigerate or freeze the remainder of the squash.
  • To the soup pot add the vegetable broth, shallots, apples, garlic, onion, spices and chile powders,  ginger, salt & pepper.
  • Simmer on medium low for about 45 minutes.
  • Puree in food processor or blender. Return to heat.
  • Add coconut milk (and peanut butter). Blend well and adjust seasoning and add vegetable broth if it’s not thin enough. Coconut milk and peanut butter will dilute spices more than broth.
  • Top with candied pecans (in maple syrup with ginger) and toasted salted pepitas (pumpkin seeds)


Posted in Appetizer, Dairy-Free, Fall, Freezing & Canning, Gluten-Free, Lunch, Recipes, Seasonal Eating, Second Harvest, Soup, Vegetarian, Winter | Tagged , , , , , , , , , , , , , , | Leave a comment

Root Vegetable Hash

This recipe was inspired by a lovely breakfast I had at Cafe Helios a couple of weeks back. It really hit the spot on a chilly Sunday morning when I didn’t feel like cooking but I did feel like eating well. The original dish used purple potatoes but I wanted to use all rutabagas because they are in season where potatoes have been stored since the end of summer.  And, Murray Cohen (Cohen Farm) had gone out to the garden to dig me out some very fresh rutabagas when I was at the farm picking up the sausage and eggs.

For those of you that visited the Remodel Expo at Kitchen & Bath Galleries in Raleigh, this is the base recipe that was served in the Sub-Zero / Wolf Kitchen. You can make this vegan, vegetarian or add some local sausage. It’s a hearty meal anytime with a couple of poached eggs on top and some wonderful baby arugula from the market under all of it. Have some fun with your family by using different colored carrots and sweet potatoes for this recipe. You’ll have everyone guessing as to what each vegetable piece really is in the dish.

The great thing about this recipe is that you can basically make up all of the ingredients ahead of time and portion out smaller amounts as you need them from the freezer or you can bake this in a casserole dish and serve to a group of folks (remember to use a little parchment in the bottom of the casserole to avoid sticking).  I know you hear that from me a lot, but if you’re on the go, these simple strategies of making ahead and portioning food in the freezer saves you a ton of time later. You’ll also find yourself eating healthy in a fraction of the time using seasonal ingredients. Either way, this is simple and requires nothing but olive, good salt & fresh ground pepper. You can add some fresh herbs like thyme and rosemary if you have them along with roasted garlic and slow cooked onions to customize this for your own family.

Normally I roast all of the veggies separately in large batches and portion them out for freezing. This allows me to cook each one perfectly. But if you want to just make a large batch with everything combined, that is possible too and I’ve written the directions to accommodate that technique. You will just need to add the vegetables to the cooking mix at different times so you don’t over-cook any of them. Rutabagas will take the longest to roast and I like using some blend of rosemary, thyme and oregano along with smoked salt and smoked peppercorn on these with the olive oil.  An Italian Blend of dry spices will work just as well if you don’t have fresh in your garden.

The sweet potatoes will go in second and then the parsnips and lastly the carrots. Typically I prefer just a simple treatment of Himalayan salt & Four Peppercorn Blend on these three veggies with a light coating of olive oil. All of the veggies roast at 425F and I prefer to use some parchment paper in the bottom of the pan to avoid sticking and minimize the use of the olive oil. This allows for browning.

All of the veggies should be chopped to bite-size pieces about 1/2-1 ” in size. Smaller pieces can take less time but may fall apart when you go to reheat. If you choose to go smaller, don’t fully cook your veggies so they can finish in the pan when you re-heat them later. I’ve written a recipe to easily feed two people so you can increase  the amounts for more servings or leave it the same for a side dish for four people.

If you have some concerns regarding glycemic values of the different root veggies, there’s a wonderful article posted at NCSU’s site for sweet potato cooking methods and starch content. There’s some additional information at the Whole Foods Website on cooking methods for sweet potatoes as well. And lastly, here’s a great  list of sweet potato descriptions based on their skin and flesh colors. Two of my favorites for this recipe are Beauregard and Garnet because of their rich orange color. But be my guest to use the purple ones too!

To add some additional color, I have used the red, yellow and purple carrots and baby parsnips tend to be an ivory color and less spicy than older larger ones. Rutabagas are a great substitute for potatoes and they roast up well with a hint of sweetness to them. I find they hold up better in this dish than potatoes. I save the potatoes for the Potato & Beef Hash recipe that uses a little milk instead.

Select whatever sausage you would like for your meal if you are inclined towards meat. Local Pork and Venison (hunting friends) sausages have worked well so far in tests. I think chicken sausage might be a bit light with the root veggies but if you try it, please let me know what you think!


Root Vegetable Hash with Sausage & Eggs

Ingredients for Two-Person Serving

  • 1 1/2 cups rutabaga: washed, skinned & cut into 1/2″ – 1″ cubes
  • 1 cup sweet potato: washed, skinned & cut into 1/2″-1″ cubes
  • 3/4 cup parsnips: washed, skinned & cut into 1/2″ cubes
  • 3/4 cup carrots (darker colored red & purple if available): washed well, cut into 1/2-1″ cubes
  • 1/4 cup sautéed onions (optional)
  • 1/2 teaspoon roasted garlic (optional)
  • 1/4-1/2 cup olive oil
  • 1 teaspoon Himalayan Salt (substitute 1/4 teaspoon of Chardonnay Oak Barrel Smoked Salt with rutabagas if you have it)
  • 1/4 teaspoon fresh cracked pepper (Four Blend Peppercorn)
  • 1/2-1 teaspoon fresh chopped rosemary (for rutabaga only)
  • 1/2 teaspoon fresh chopped thyme (for rutabaga only)
  • or 1 teaspoon dried Italian Herb Blend
  • 2 teaspoons butter (optional)
  • 1/2 lb sausage, cooked (optional)


Preparation to Serve Immediately

  • Pre-heat the oven to 425F
  • Line a heavy-duty baking sheet with parchment paper spread the rutabagas on the sheet. Turn lightly with 1/4 portion of the olive oil, 1/4 of the salt & pepper. If you have spices, toss these with the rutabaga. The vegetables should be lightly coated in oil.
  • Bake at 425F for about 7 minutes.
  • Add the sweet potato and parsnip cubes and 1/2 of the portion of salt & pepper and enough oil to coat lightly.
  • Bake all three vegetables for another 7 minutes or so.
  • Add the carrots and toss with remainder of salt, pepper and oil to coat.
  • Bake all of the vegetables another 7 minutes or until they are lightly browned or soft to your preference.
  • Serve with poached eggs and arugula.


Alternate Preparation Method with large stainless or cast iron skillet

  • Separately toss all of your veggies with olive oil, salt and pepper. Toss the rutabagas with herbs if you have them.
  • Bring the skillet (you may want a lid for this) up to medium heat.
  • Pre-cook your sausage if you plan to use it. Wipe out the skillet with a paper towel when you are done, pulling out most of the leftover grease.
  • Reheat the stainless skillet a little more than medium because it will cool down faster when you add the veggies. Be careful heating the cast iron skillet too hot so you don’t burn the veggies when you add them.
  • Add a teaspoon of olive oil to the warm skillet. Start the rutabagas in the skillet. You won’t need to toss these too much. You may want to add a lid to keep the mess down. Cook for about 5 minutes.
  • Add the sweet potatoes and the parsnips and cook another 7-10 minutes.
  • Add the carrots and finish cooking all of the veggies until they are lightly browned or cooked all the way through. Using the lid will keep the pan warmer so watch for burning or cooling and adjust your heat.
  • Serve with poached eggs, sausage and arugula or as a side dish.


Notes

Onions come into season in the summer and we roast more than 50 lbs of them for our household alone. They take a while to slow cook and caramelize but in a recipe like this, they are invaluable for flavor. If you don’t have onions pre-cooked, start the recipe off by cooking your sausage if you are using it. After you clean the grease out of the pan, add the onions with a little bit of olive oil and butter and slow cook them for about 15 minutes and then you can add the vegetables and continue to cook them with the root vegetables, just being careful not to burn them.


Posted in Breakfast, Dairy-Free, Fall, General, Gluten-Free, Lunch, Recipes, Seasonal Eating, Second Harvest, Sides, Vegetarian, Winter | Tagged , , , , , , , , , , , , , , , , , , , , , , , , , | Leave a comment

Upside-Down Apple & Pecan Ginger Cake

This week we’ve been fortunate to wear sandals, again. Is it really January? Apparently brief snow showers are a possibility for tomorrow’s weather?  Welcome to climate change which brings me to my second topic.

Earlier in month Maple Creek Farm in Burnsville, NC cancelled their maple syrup production season. It’s just too warm and the sap isn’t flowing up and down the tree as it should. I am so disappointed because I use maple syrup all year-long in so many recipes to replace refined sugars. I have 2 bottles left of their incredible rich syrup from last year. That’s going to have to last the rest of the year and I’m not sure how to make that work. They are still offering tours of the farm and I highly recommend those for folks interested in the process of farming in the mountains and specifically what it takes to have a good location for maple syrup. Here’s a good link to start with: http://www.maplecreekfarm.net/

Which brings me to my third topic, a recipe post that uses maple syrup. I haven’t posted a recipe in a while. I’ve been cooking, but after the main markets closed, I decided to work on some other projects and make a series of trips to Western North Carolina to meet with some new product vendors and see manufacturing facilities geared for artisan producers.

During one trip I came across a relatively new line of Gluten-Free products from Moon Rabbit Foods that I decided to try to play with to make items just a bit different from their intended purpose.

Chocolate brownies got a few additional items put into them and then were re-baked into biscotti. Pancakes were cooked at the market with dried apples and toasted pecans.  But I thought I could take the pancake mix just a step further to make a variation of an upside down cake. It  turned out to be  quite easy so I want to show you how in this simple recipe.

I used a couple different small cast iron frying pans for this recipe and both turned out well, although I think that the cast iron pan that was not enameled on the inside worked a little better to release the pancake and it seemed to rise up a bit better when I used a cast iron lid to hold in the heat and steam as it cooked.

And as a last note, let me take you to a short article on the differences between true cinnamon and cassia that was posted earlier this week by Savory Spice Shop in Raleigh: http://suite101.com/article/difference-between-cassia-and-cinnamon-a89695

*Moon Rabbit Foods products are available in NC at EarthFare.


Upside Down Apple & Pecan Cake

Ingredients

  • 3/4 cup Moon Rabbit Foods “Pancake & Waffle Mix”
  • 3/4 cup Low-fat  milk
  • 1 tablespoon melted butter
  • 1 large egg
  • 2 chopped apples (sweet, not too tart), chopped
  • 1/4 teaspoon Ceylon Cinnamon
  • pinch of nutmeg
  • 1/2 teaspoon maple sugar, turbino sugar, or brown sugar (each varies in sweetness so adjust amount)
  • 1 tablespoon butter (or half coconut oil, half butter)
  • 1/2 cup pecan pieces
  • 2 teaspoons maple syrup, pinch of Himalayan salt
  • 1/4 teaspoon candied ginger, finely chopped (optional)
  • Additional maple syrup for serving.


Preparation

  • Pre-heat the oven to 350F.
  • Mix the pancake mix, milk, egg and butter. Set aside and it will thicken as it rests.
  • Using a 6-7″ cast iron pan (with a lid), melt 1 tablespoon of butter (or half butter & half coconut oil) on med/low heat. Add the pecan pieces and lightly cook along for about 3-5 minutes. Add 2 teaspoons of maple syrup and the pinch of Himalayan salt and cook on medium heat for about 2 more minutes just to reduce the maple syrup a bit. Set aside on a plate.
  • Using the same cast iron pan on med/low heat, cook the apples with cinnamon, nutmeg and sugar for less than 5 minutes, until they have barely begun to soften.
  • Add the pecans back to the warm pan on the stove top with the stove set to med/low. Add a little butter or coconut oil if the mixture seems dry because this will help the pancake release at the end of the process.
  • Slowly pour the pancake batter into the pan in a circular motion, covering all of the pecans and apples, while continuing to cook. Keep the apples and pecans stationary on the bottom as you pour the mixture into the pan.
  • Cover the pan with a heavy lid and put into the oven at 350F for 10 minutes. The pan can remain covered the entire time.
  • Remove and let it sit a couple of minutes before flipping it out upside down on a plate.
  • Serve with maple syrup or whipped cream with a bit of maple syrup.

A few additional photos from the cooking process.


Posted in Breakfast, Dessert, Fall, General, Gluten-Free, Recipes, Seasonal Eating, Winter | Tagged , , , , , , , , , , , , , , , , , , , | Leave a comment

Vegetable Duck Soup – Two Ways

Duck can be a difficult bird to master. There’s the thick layer of fat that keeps it warm in the water and tastes wonderful when used appropriately in cooking. But, let’s face it, it scares off many a cook. Since I normally cook a whole bird, I treat it simply. The meat gets used a couple different dishes so glazing it with orange or something specific like that doesn’t always work for leftover meals. My advice would be for you to think about a couple of dishes you might want to make from one bird and then decide what flavors to add when you cook it.

For this bird, I wanted to make Duck Soup, Duck Vegetable Pot Pie and try out Mushrooms Stuffed with Duck & Root Vegetables.

I simply scored the fatty breast side of the bird so the fat would render as the bird roasted in a very large Le Creuset Dutch oven. To avoid some initial sticking of the fat, I lightly oiled the inside of the pot with about a tablespoon of olive oil. Initially I browned the breast side on the top of the stove on medium heat. Then I lifted the bird and place it on a rack in the pot about a half-inch from the bottom of the pan so the bird would not be sitting in the fat as it rendered, breast side up, lid on at 300F. One point to note, most recipes don’t call for using a heavy cast iron Dutch oven like the Le Creuset that I like to use most often. This type of pot cooks hotter once it’s heated up then roasting in a traditional roasting pan. I have been successful in reducing the heat by as much as 50F and still easily maintaining the 300 temperature.   Basting the bird every 20 minutes or so with the fat that is rendering is useful as well to keep the bird moist. And flipping the bird each hour from breast side up to breast side down works well. You are looking for an internal temperature of 165F.

After the bird has cooled, pull the meat from the bones. If you have a lot of fatty skin that hasn’t rendered well, cut it up and place it back in the pot without the rack and cook it on low on the top of the stove for another thirty minutes or so until you have a fair amount of fat left (you can leave the lid on). You can refrigerate and freeze this fat to use later. Roasting potatoes or chicken in the fat is wonderful. It’s not terribly healthy, so it’s a special treat, maybe reserved for a special holiday celebration. I actually double roast the pre-roasted potatoes in the fat once I pull them from the freezer just to crisp them up a bit.

Next place the bones right in that same Dutch oven and add filtered water to about 3/4 of the way up the pot. This was easily a half-gallon of water for my Dutch oven.  Add a tablespoon of Italian Herb blend; about 4-5 3″ long pieces of fresh thyme and 2 pieces of 4″ long rosemary; one onion cut up; about a cup of carrots, cut up; a turnip cup up; 1 clove of garlic; 3-4 whole cloves; a couple of bay leaves, 2 stalks of celery or 1/2 cup of dried celery leaves, 1/2 teaspoon pepper and 2 teaspoons salt. Bring this to a simmer and cook about and hour or two. Whatever fits your schedule.

Pull any additional meat off of the bones that is now free from the cooking process and set aside with the other meat. Strain your stock, refrigerate and freeze it in 16 or 32 oz containers so it cools quickly. Skim the fat off when it’s cool enough to rise to the top. I discard this fat. It doesn’t have the same clear color or flavor of the rendered skin fat since it’s been cooked with vegetables and herbs.

Now we can begin to make soup. Yes, it seems like a lot of trouble, but you’ll have a lot of meat and if used wisely, you will get at least three large meals out of this bird. For this recipe, I used carrots, onions, celery and mushrooms that were harvested earlier in the year and frozen after being lightly sauteed. The soup pulls together a little quicker this way.


Healthy Seasonal Duck Soup prepared with local vegetables, greens and rice


Vegetable Duck Soup with Greens & Brown Rice

Ingredients

  • 6 cups duck broth
  • 2-4 cups filtered water
  • 1 1/2 cups chopped duck meat
  • 8 oz chopped onions
  • 8 oz chopped celery
  • 16 oz chopped carrots
  • 8 oz sautéed sliced shiitake mushrooms
  • 1 teaspoon Italian herb blend
  • 1 teaspoon fresh thyme, chopped (or 1/2 teaspoon dried French thyme)
  • 1/4 teaspoon ground marjoram
  • 1/4 teaspoon ground poultry seasoning
  • 1 bay leaf
  • 2-4 cups shredded baby chard (or other mild winter / spring green) (stems removed)
  • 1 cup cooked brown rice / wild black rice / or quinoa (or blend of all three)

Preparation

  • If you haven’t previously cooked the mushrooms, you can use the same pot you plan to cook your soup in to saute the shiitake mushrooms.  Use a mixture of butter and olive oil with salt & pepper. This will take about 10 minutes. Set the mushrooms aside.
  • If you aren’t using previously prepared/cooked vegetables, you’ll need to saute the onions, celery, and carrots first in a little olive oil. Use the same pot you used for the mushrooms and it will free up any leftover pieces. Use some butter for additional flavor.  Add a little salt and pepper during the saute process to caramelize them a bit.
  • Next add the broth, water (add water to adjust for how much liquid you like in your soup), herbs, spices, bay leaf, duck meat, 1 teaspoon salt (Himalayan or Chardonnay Oak Barrel Smoked work well) and 1/4 teaspoon Pepper (Four Corners Pepper Blend works well) to the onions, celery and carrots. Bring to a simmer and cook for 15 minutes. The longer you cook the more tender the meat and vegetables will get.
  • Add whatever blend of cooked rice (our brown rice comes from Edible Earthscapes in Chatham County, NC) or quinoa that you prefer along with as many shredded greens as you would prefer, and the mushrooms.
  • Cook for an additional 5 minutes to wilt the greens, cook the peas, and warm the rice/quinoa.
  • Serve with crackers and goat cheese or warm cheese bread.


duck udon 3

Duck Soup with Roasted Carrots, Shiitake Mushrooms & Udon Noodles on  2/7/14

Follow the basic directions for the soup above, adjusting the water for the volume of noodles you prefer.

  • Cut the carrots in long strips instead of pieces and roast with olive oil and herbs until they are deep brown in some spots. They will be easier to pick up with chop sticks along with the noodles this way. They can be frozen this way and just pulled out of the freezer when you want to use them in the soup.
  • Reduce the celery and onions by half.
  • Eliminate or change the greens to baby Bok Choy or some variation of mild baby Asian green or delicate cabbage like Savoy, julienne cut. Do not let the green compete too much with the mushrooms and duck.
  • Prepare whole-wheat udon noodles separately instead of rice.
  • Substitute half of the Shiitake mushrooms with Oyster or other more mild mushroom for variation in texture and flavor.


Posted in Dinner, Fall, Freezing & Canning, General, Gluten-Free, Lunch, Recipes, Second Harvest, Soup, Winter | Tagged , , , , , , , , , , , , , , , , , , , , , , | 2 Comments

Roasted Pepper, Corn & Heirloom Tomato Soup

Last year I developed a Roasted Pepper & Balsamic Hummus recipe that was quickly changed into soup with the addition of some veggie stock. It wasn’t all that it could be and I felt like it lacked some depth and dimension.  So this year I spent  some time researching other recipes and developing a base set of ingredients that could be taken in a couple different directions with small changes.

This soup is full of flavor from the excellent crop of organic corn, heirloom tomatoes, sweet southern onions and long Italian peppers we had at every market in the area. Every one of these crops came in with outstanding flavors and I’m not sure I would have had such success with this recipe if the individual components weren’t so good.

Having said that, the base recipe depends on your ability to take in local crops and roast them to pull out the rich flavors. Caramelizing helps develops the sugars in the vegetables that you can’t get by just blending or cooking them in the broth. It is what makes this soup shine above last year’s recipe.

I also pulled half of the test batch to add some pureed cannellini  beans and aged balsamic vinegar for a hummus dip.  And I pulled some of the base soup and added fresh goat cheese, toasted pine nuts and fresh basil for a spaghetti sauce. Both are quick and give you a couple more options for your frozen base soup without a lot of time or trouble.


Roasted Pepper, Corn & Heirloom Tomato Soup

Ingredients

  • 8 oz Italian Peppers, roasted (finished weight)
  • 8 oz sweet corn, lightly sauteed (finished weight)
  • 4 oz sweet yellow onions, roasted (finished weight)
  • 4 oz sweet red onion, roasted (finished weight)
  • 12 oz roasted heirloom tomatoes (finished weight, about 3 med/large raw tomatoes)
  • 1 1/2 teaspoons roasted garlic
  • 32 oz broth (chicken or vegetable)
  • 1 teaspoon Chardonnay Oak Barrel smoked salt
  • 1/2 teaspoon Himalayan salt
  • 1/4 – 1/2 teaspoon ground Mesquite & Applewood Smoked peppercorn


Optional Ingredients

  • 4 oz cannellini beans pureed (per 8 oz base soup)
  • 1 teaspoon 10 yr aged balsamic vinegar
  • 1-2 oz fresh goat cheese (per person)
  • 2 teaspoons fresh chopped basil or parsley
  • 1 teaspoon toasted pine nuts (per person)
  • spaghetti
  • toasted pepitas (pumpkin seeds)

Preparation

  • As each vegetable comes into season, roast, steam or slow cook them and freeze in small 8 oz containers to make this recipe simple and fast to prepare all fall and winter.
  • Pull the “cooked” peppers, corn, tomatoes and onions and let them thaw.
  • In a large stock pot, add the vegetables, 2/3 of the broth, garlic, salt & pepper. Let simmer for 15 minutes.
  • In batches, puree the soup in a blender until smooth. Add more broth if the soup is too thick or will not process smooth enough.
  • Reheat one for 5 minutes on medium until it comes to a boil for a couple of minutes. Serve and top with toasted pepitas.

Optional Preparation

  • Add cannellini beans and balsamic vinegar during the puree process along with additional broth if you want a soup. Leave it thick if you want a chip dip or hummus for a sandwich.
  • Add goat cheese, fresh basil or parsley and pine nuts and serve over cooked spaghetti
  • The soup will freeze with or without beans.
Posted in Appetizer, Dairy-Free, Diabetic Friendly, Dinner, Fall, Freezing & Canning, Gluten-Free, Lunch, Nut-Free, Recipes, Seasonal Eating, Second Harvest, Summer, Year-Round | Tagged , , , , , , , , , , , , , , , , , , , , , , , , , , , , , | Leave a comment

Sweet Potato Lattes

As most of you know, I will drink just about anything warm once the weather turns chilly. I found a recipe this week for a latte made with baked pumpkin in the “Long Nights and Log Fires” cookbook (by Ryland, Peters & Small) which got me to thinking about whether it would be feasible to swap sweet potato or a winter squash like butternut or acorn for the pumpkin since I have all three put up in the freezer at the moment.

I searched the internet and found out that sweet potato warmed with soy milk appears to be a popular drink in Korea but the recipes seem to border on soup with the concentration of sweet potato. Starting with a base recipe and tweaking it a bit, I came up with something that I think parents will like for their kids to replace hot chocolate in the morning. The added advantage here is you get to control the sugar your family is taking in and you can easily change the milk to low-fat, coconut, almond or soy if you need something vegetarian. The recipe tastes nice with about 1/3 cup of coffee added to it. Too much and it will overpower the sweet potato which is less strong than pumpkin.

After I ran the first recipe a couple of times to get the measurements I decided to pull out the Chai Tea Kit I picked up at the Downtown Raleigh Farmers’ Market a few weeks back from Olifant & Castelo. I haven’t had a chance to play with it and this seemed like a good opportunity given the rain and chilly temperature this morning.

For the second recipe, I used the stove top to slowly steep the spices and tea with the milk and sweet potato. I also adjusted the recipe that came in my kit slightly. I have to say that the end result was subtle, complex and quite nice to slowly sip compared to the first test which tastes like dessert in a cup, especially with the whipped cream topping!

The really nice thing about both of these recipes is that they can be made a couple of days ahead of time, stored in the fridge, and warmed as you need them. The second positive note is that you can  control the sugar and calories in these by altering the milk and sweetener. While I don’t advocate chemical sweeteners, you can adjust the maple sugar or maple syrup to fit your dietary needs. Sweet potatoes are already sweet so these drinks require less than you would think to seem rich and decadent.

A couple of notes. This drink needs to be blended well. Chunks of sweet potato don’t taste good. So use a blender or a small food processor to blend your milk, sweet potato, spice and sugar (or maple syrup) before heating. I used the microwave in one test and the stove top for the Chai Tea blend test. An espresso machine will work equally well, especially to get a little froth on the top. Feel free to add some whipped cream if you have guests and have the kids help you make it!


Sweet Potato Pie Latte for One

Ingredients

  • 3-4 tablespoons cooked sweet potato, puree well
  • 1 cup milk (whole, low-fat, coconut, almond, soy)
  • 1 teaspoon Maple Creek Farm maple syrup (or maple sugar, which will be sweeter)
  • 1/4 teaspoon Pumpkin Pie Spice blend
  • pinch nutmeg
  • whipped cream
  • 1 shot of espresso or about 1/4 – 1/3 cup of coffee (optional)

Preparation

  • Put all the ingredients except the nutmeg in a small food processor or blender and mix until smooth.
  • Refrigerate until ready to heat.
  • Heat on low until it reaches 140F or a little higher.
  • Serve with a pinch of nutmeg and whipped cream on the top.


Sweet Potato Chai Latte for One

Ingredients (spices from Olifant & Castelo Chai Tea Kit)

  • 1 stick cinnamon (about 1″ long)
  • 4 cardamom pods
  • 5 whole cloves
  • 1/2 teaspoon whole black peppercorns
  • 1 star anise pod
  • 1/4 teaspoon ginger powder
  • 1/4-1/2  teaspoon loose black tea
  • 1 teaspoon Maple Creek Farm maple sugar (or maple sugar, which will be sweeter)
  • 1 cup milk (whole, low-fat, coconut, almond, soy)
  • 3-4 tablespoons cooked sweet potato – puree well

Preparation

  • Put all of the ingredients in a small pot and simmer without boiling over for 5 minutes.
  • Stir as necessary as it’s cooking.
  • Strain and serve plain or with whipped cream.


Posted in Dairy-Free, Drinks, Fall, Gluten-Free, Nut-Free, Recipes, Seasonal Eating, Second Harvest, Vegetarian, Winter | Tagged , , , , , , , , , , , , , , , , , , , , , , , , , , , , | 9 Comments

Simple Summer Squash & Zucchini Soup

We could talk about the weather all day long. Hot and humid one week to delightful fall weather the next and back again. It seems to agree with the summer squash and zucchini this year so let me give you a couple of ideas of what you can do with an abundance of these delicate veggies. They don’t freeze well and I’m not fond of the way they dehydrate either, although some folks swear by zucchini chips. But they do hold up pretty well in the freezer for soup if you shred or finely chop and steam them before freezing.

This simple soup is nice either chilled in the middle of summer  or warmed up on colder days. It takes no time to pull together and it freezes well. Use either vegetable or chicken stock. The homemade chicken broth will create a little thicker soup than the vegetable stock.  Smaller zucchini and squash work better for this recipe because they have fewer seeds and more delicate skin. Pattypan squash should work equally well for this since it inherently has fewer seeds.  And as a cost savings, you  might be able to find a farmer that has some summer squash with a virus. This makes the outside of the squash look funny, but it tastes the same and it is generally much less expensive, so ask around the market! This recipe will make about 4 servings.


Summer Squash & Zucchini Soup

Ingredients

  • 3/4 cup raw sliced sweet variety of yellow onion slow cooked down to about in olive oil to 1/3 cup
  • 1/2 cup raw leeks (white part) finely chopped & slow cooked in butter & olive oil to 1/4 cup
  • 1/2 lb baby green zucchini, shredded with large grater
  • 1/2 lb baby yellow crookneck or zephyr squash, shredded with large grater
  • 1 teaspoon Italian herb blend
  • 1/4-1/2 teaspoon fresh thyme, finely chopped (add to your taste)
  • 1 teaspoon garlic, minced
  • 1 1/2 – 2 cups chicken broth or vegetable stock

Preparation

  • Slow cook the sliced  or diced onion and leeks until they are soft and transparent in butter and olive oil. This may take up to 30 minutes. Do not brown. The longer you cook them at a lower temperature, the sweeter they will be in your soup.
  • Add the raw zucchini, squash, garlic and herbs to the onion and leek mixture and continue to cook for another 5 minutes until everything is soft. Add some broth if it begins to get too dry or stick.
  • Add about half of the stock of your choice and simmer another 5 minutes .
  • Using a food processor or blender, puree all of the mixture and add stock as you puree to get to the consistency that you prefer.
  • Reheat or chill and serve with goat cheese and some fresh herbs as a topping.

Notes

This soup freezes and thaws well.

Posted in Appetizer, Dairy-Free, Diabetic Friendly, Fall, Freezing & Canning, General, Gluten-Free, Lunch, Nut-Free, Recipes, Seasonal Eating, Second Harvest, Soup, Summer, Vegetarian | Tagged , , , , , , , , , , , , , , , , , , , , , , , | Leave a comment

Piment D’Espelette Chili Roasted Potato & Corn Soup

At the Wednesday farmers’ market cooking demo  I had a lot of questions about “chowder”. I consider a chowder to be a very thick soup that normally has fish added to it. So technically I made “soup” yesterday at the market, despite its thick texture. When I make this at home I add leftover shrimp, scallops or sheepshead fish that I have pan sautéed in a mix of olive oil and butter until golden brown and crusted slightly.

The chili pepper spice I use in this recipe is Paprika pepper: Piment D’Espelette. It is smoky and a bit sweet, without a tremendous amount of heat which is why it can replace black pepper in many dishes. This pepper plant originates in Mexico & South America. Around the 16th century the French started cultivating it for medicinal purposes and it is now grown throughout the Basque Region and imported. The pepper is picked right about now and it dries through the month of October. I’m sure you could change out this spice for a variety of other mild to medium heat dried chili peppers. If you wanted to use a local pepper, I found one local farm growing this last year: Wild Onion Farm. We dried some and froze some lightly cooked in olive oil. Both worked really well in recipes until I ran out mid winter.  And then I  just happened to get a sample of the spice and grey salt mix from Savory Spice Shop early last year and enjoyed the way it worked in this recipe if you can’t find it locally.

The other change that I made at the market was to use a food mill instead of a food processor. It’s a lot lighter and easier to deal with a mill at a market since it only requires your arm to operate and not an extension cord and the possibility of dropping it while packing and unpacking supplies. However the texture the food processor provides is more creamy as the fast spinning blade cuts through the potato skins better than the food mill which separates them from potato.

The mill’s generally purpose is to skin vegetables and fruits for you. In this recipe, I really like the nutrition and flavor the skins on the baby potatoes add, so I prefer the food processor. I like the base texture to be smooth (food processor is fast for this) and then I throw in part of the roasted potatoes, corn and the fish at the end for the texture. Or you can process all of the potatoes and corn and just float the fish in the center with a garnish of fresh parsley or chives.

One other major note for this recipe. As many of you already know, I freeze a lot of vegetables as they come in from the field. For this recipe, it is possible to cook both the  potatoes and corn and freeze them until you need them for the recipe. If you maintain a ready supply of  stock, you are already on your way to making this meal in under thirty minutes once everything has thawed. That is the way we work with almost 90% of our food purchases from local vendors throughout the year. It’s a lot of planning and additional freezer space is required, but you can produce an excellent home-cooked meal where you control the spices, preservatives, sodium and food quality in no time at all.

If you have kids in college,  send them back to school with some of this soup in a care package!


Photo coming after the rain!


Piment D’Espelette Chili Roasted Potato & Corn Soup

Ingredients

Preparation

  • Line a large baking sheet with parchment paper.
  • Place chopped potatoes on the baking sheet. Lightly coat the potatoes with olive oil, grey salt & 1 teaspoon of the chili powder.
  • Cover with aluminum foil and bake at 425F for 30 minutes. They should be tender and cooked through. Alternately you can cook these in a wide casserole dish on the top of the stove if you watch them and stir so as not to burn. Remove and chill right away if you are not going to make the soup immediately.
  • Heat a large Dutch Oven and add about 1 teaspoon of olive oil once it’s warm.
  • If you haven’t roasted onions and need to saute them, this is the time to cook them slowly for about 15 minutes before moving on to the corn.
  • Add the fresh-cut corn and lightly saute for 5 minutes or less. You can cook this as much or as little as you would like but the sweeter and fresher the corn, the less time it should spend in the pan.
  • If you are working with raw garlic, this is the time to lightly cook the garlic on low for a couple of minutes (very light golden but not browned).
  • Add the broth, cooked potatoes, garlic, onion, liquid tamarind paste concentrate to the corn and cook for 15 minutes.
  • Process the soup in a food processor until it is fairly smooth (2-4 minutes).  You can add additional broth, whole milk or cream if you find it becoming to thick or it isn’t getting smooth enough (which is an indicator that there isn’t enough liquid to be absorbed by the potatoes when processing).
  • Re-heat the soup gently and adjust the piment chili powder, Himalayan salt and pepper to your taste. The chili pepper will get a little hotter as it sits and if you want to add some additional heat, a pinch of cayenne is a good companion pepper.
  • If you have fresh peppers from the farm, lightly saute a few and top the soup with those or some that you have dehydrated and crushed.
  • The recipe easily feeds 6 people with the addition of fish.

Notes

  • Fresh cut chives added after the soup is finished cooking as either a garnish or an ingredient work well.
  • If you choose to freeze this soup, do not add the dairy or fish until after you thaw the soup.


Posted in Dairy-Free, Fish, Freezing & Canning, General, Gluten-Free, Recipes, Seasonal Eating, Soup, Summer, Vegetarian, Year-Round | Tagged , , , , , , , , , , , , , , , , , , | Leave a comment

Southern Grits & Sweet Magnolias

I never had grits before my first trip to visit the School of Design campus at NCSU (a very long time ago). My mother only made oatmeal and cream of wheat. We won’t comment further about either of those two foods.

All I can say is that breakfast at the old Hilton on Hillsborough Street included fluffy Southern biscuits with butter and honey along with creamy grits. I have no idea whether they were prepared correctly or not. But dare I say it was one of the determining factors in my decision to decline my slot at a Chicago University and move south. That and maybe the sweet smell of magnolia trees.

My skills have improved over the years and the only advice I will give here is that they should be cooked all the way through. I do not like a gritty texture. I like my grits smooth and it takes 45 minutes to an hour to get them that way, stirring most of the time. You don’t rush risotto and you don’t rush grits. It’s all in the process for both.

The simple information is the ratio of milk, water and grits I use. 3 parts whole milk (low-fat will work if you monitor your simmer point and don’t overheat it), 2 parts water, 1 part stone-ground organic grits I use Lindley Mills organic stone-ground grits. Lindley Mills was established in 1755 at its present location. Knowing my love of historic places, you know I couldn’t pass up the opportunity to support these folks!

Now put on your comfortable shoes and tune the radio or TV to something you will enjoy for an hour. Get your spatula ready to stir and commence with cooking!


Southern Grits 101

Ingredients

  • 3 cups whole milk
  • 2 cups filtered water
  • 1-2 tablespoons butter (don’t skip or change this)
  • 1 teaspoon Himalayan salt
  • 1/4 – 1/2 teaspoon fresh ground pepper

Preparation

  • To a large pan, add the milk, water, butter, salt and pepper.
  • Bring it up to a slow simmer. Don’t be tempted to walk away once you turn the stove on because milk boils over easily and you won’t enjoy the clean-up process at all.
  • As the liquid comes to a simmer, while stirring, slowly pour in 1 cup of dry stone-ground organic grits.
  • At the beginning you can stir every couple of minutes or so with a silicon spatula to keep the grits from settling and sticking to the bottom of your pot. This is where the butter is useful.
  • As the mixture continues to boil and the liquid reduces you will need to stir more often.
  • At the 30 minute mark you might be tempted to say the grits are finished because they are pretty thick. If they taste gritty (they will 🙂 ) when you sample them, continue cooking and stirring.
  • You may need to add some additional milk or you can choose to add some half / half at this point to sweeten them. Whatever you add, try to warm it before you add it so you don’t reduce the temperature of the grits.
  • At the 45 minute mark, you are probably ready to sample them for mouth texture. They should be thick and creamy with just a little grit texture. If they are ready, you can add anything to them you would like at this point: sautéed veggies, chopped meat, cheese. Blend and serve.

Notes

Leftovers? There shouldn’t be any, but if you need another way to use up extra, here’s a recipe for a Grit Casserole that is light and wonderful as a side dish for dinner.


Posted in Breakfast, General, Gluten-Free, Recipes, Year-Round | Tagged , , , , , , , , , , , , , , , | Leave a comment