Slow Roasting Individual Heirloom Tomatoes

As I went through the mid-week markets yesterday I stopped to talk to a local farmer about the weather. Normally we have plenty of hot weather and sun during the summer here in the South. Farmers are generally complaining by late August about irrigation issues and plants that ripen so fast they have to pick rows multiple times a day. And don’t get me started about eggplant complaints! Well, not this year! It seems like it’s been raining since October. There have been endless days of steady heavy rain with loads of clouds between the days of rain. Plants haven’t been producing as much to harvest and what’s coming to market is labeled as “baby” as often as not even into August. What is available seems waterlogged and devoid of our normal robust summer flavor, and nutrients have continued to leach out of the soil or the soil has simply washed away. On the plus side, it’s been an awesome year for mushrooms and we’ll have more about those in future posts this fall.

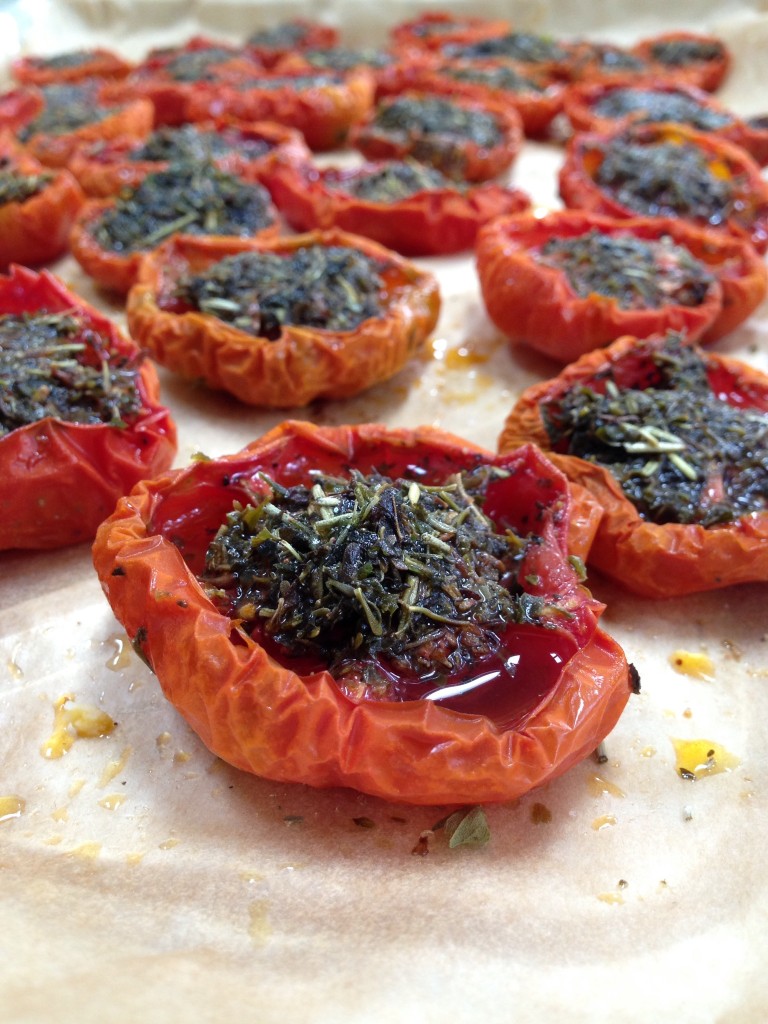
In a climate like this, it’s important to develop the flavors in whatever you plan to save for the winter months. Slow-roasting can intensify flavors by removing some of the liquid and bringing up some of sweeter sugars hidden in the vegetable or fruit (in this case). It’s as true for onions as it is for tomatoes. Small heirloom tomatoes are perfect for this slow roast technique since they have a sweeter side if you pick the right ones. The flavor comes through and they don’t take much time to prepare or room to store.  They basically require no attention once you put them in the oven until the time you take them out and they are versatile as a second harvest food once stored.

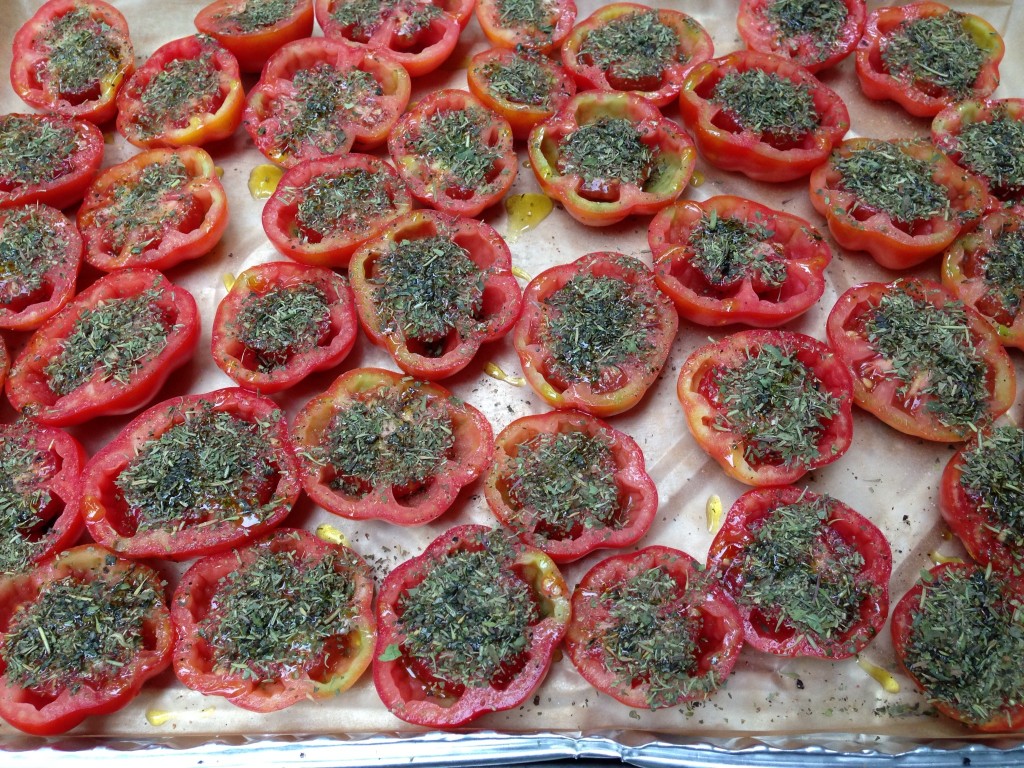
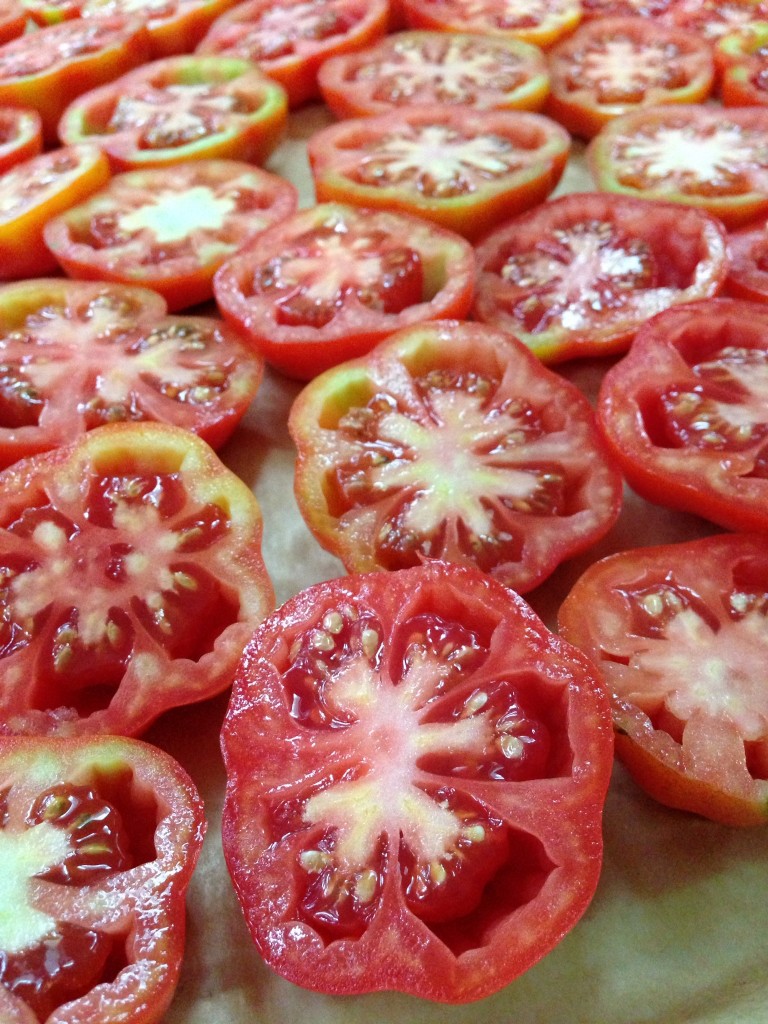
Old Milburnie Farm had some adorable organically grown heirloom tomatoes this week which easily fit into the palm of your hand. I selected these because they were a beautiful shade of bright red and Erika (aka “the farmer) explained to me that this variety didn’t have a large deep core so I could basically ignore it in the cooking process. To my delight, when cut, they looked like little flowers. There weren’t too many seeds and not a lot of pulp either so I simply cut them in half, sprinkled some dry herbs (thyme, rosemary, oregano – you can use fresh as well), to soak up the liquid and drizzled a little olive oil to keep them from sticking. I prefer to use a little Himalayan salt and fresh ground pepper to season these as well.

Using a large jelly roll with parchment paper, I was able to keep the tomato juice from burning the pan (easy clean-up too) although most of it stayed inside each tomato half as it cooked.  Using this technique, the tomatoes bake from 2-3 hours in a 250F oven.  Just cook them until you like their flavor. The plum tomatoes I cooked last week took 3 hours since they were a bit denser.  You can sample them at 2 hours and then check them every 30 minutes or so until you are happy with the result. Every tomatoes variety will vary just a bit, so plan for a few hours.

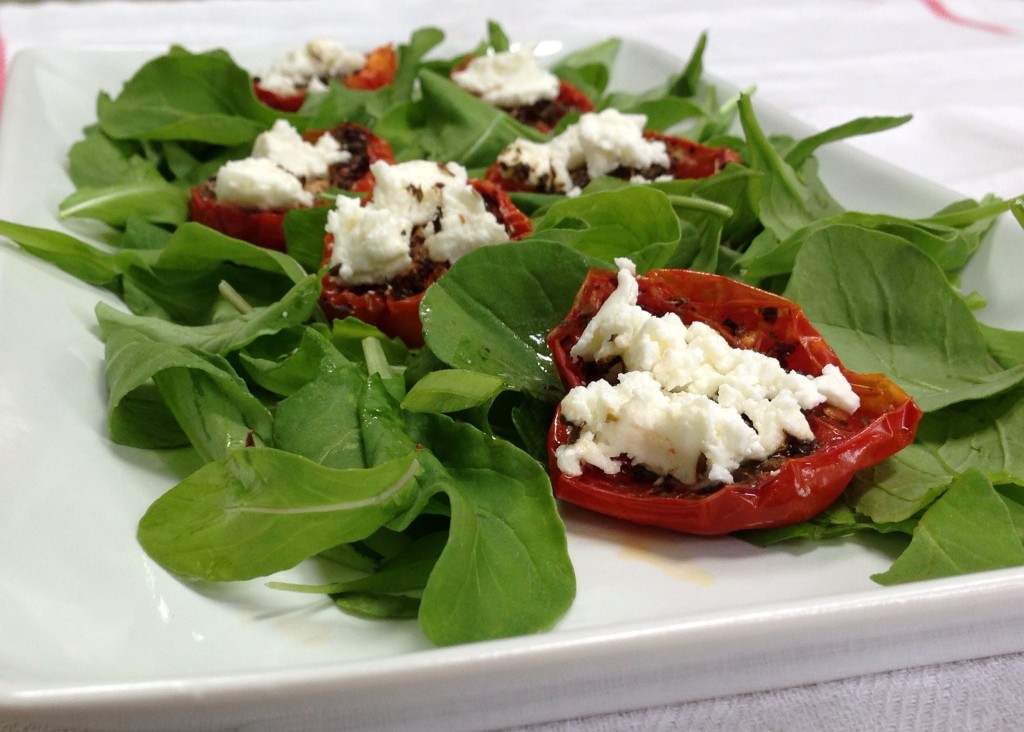
Once the tomatoes are finished, allow them time to cool and then place them in layers in small containers without smashing them. You can also add more olive oil and store them in the fridge for up to a week. Or simply put the layered tomatoes into the freezer. Allow time for them to thaw when you want to use them. They are great on individual pizzas in place of sauce, topped with goat cheese as appetizers or used on top of salads, blended into layers of pasta like lasagna or mixed into noodles or sauce, added to scones, rice or quinoa. The opportunities to use these are endless.



Posted in Dairy-Free, Diabetic Friendly, General, Gluten-Free, Nut-Free, Recipes, Seasonal Eating, Second Harvest, Vegetarian, Year-Round | Tagged , , , , , , , , , , , , , , , , , , , , , , , , | Leave a comment

Cooking with Local Oyster Mushrooms


This year there’s been a huge increase in the number of farmers and specialty growers that are ready, willing and quite capable of growing a variety of mushrooms all across our state. Maybe it’s the ridiculous wet weather and odd low temperatures, or maybe it’s just the increase in young farmers trying to find crops that are more profitable. Whatever the cause, the increased volume at the market makes it easier to buy them in bulk and use them in all sorts of new recipes throughout the year.

To start off, let’s talk about two types of mushrooms that are seen most often in our local markets around North Carolina: Oyster and Shiitake. They are pretty easy to grow and you can find many workshops available in the early spring and late fall to attend if you plan to try them at home. Personally, I simply enjoy working with farmers to get as many different types as I can find.  And I’m completely happy to support their habit of exploration in this field.  My time is better spent cooking and showing rather than growing.

Over the weekend I had an opportunity to see some Oyster mushrooms growing organically at a farm in the Appalachian mountains of Western Maryland in Garrett County. This farm uses pasteurized straw held within hanging plastic bags that are punched with the spores. Harvesting is very easy since you just have to reach out and snap the mushrooms off as they grow outside of the bags. It’s all pretty simple and quick. You can view some pictures of the Savage River Farm on facebook.

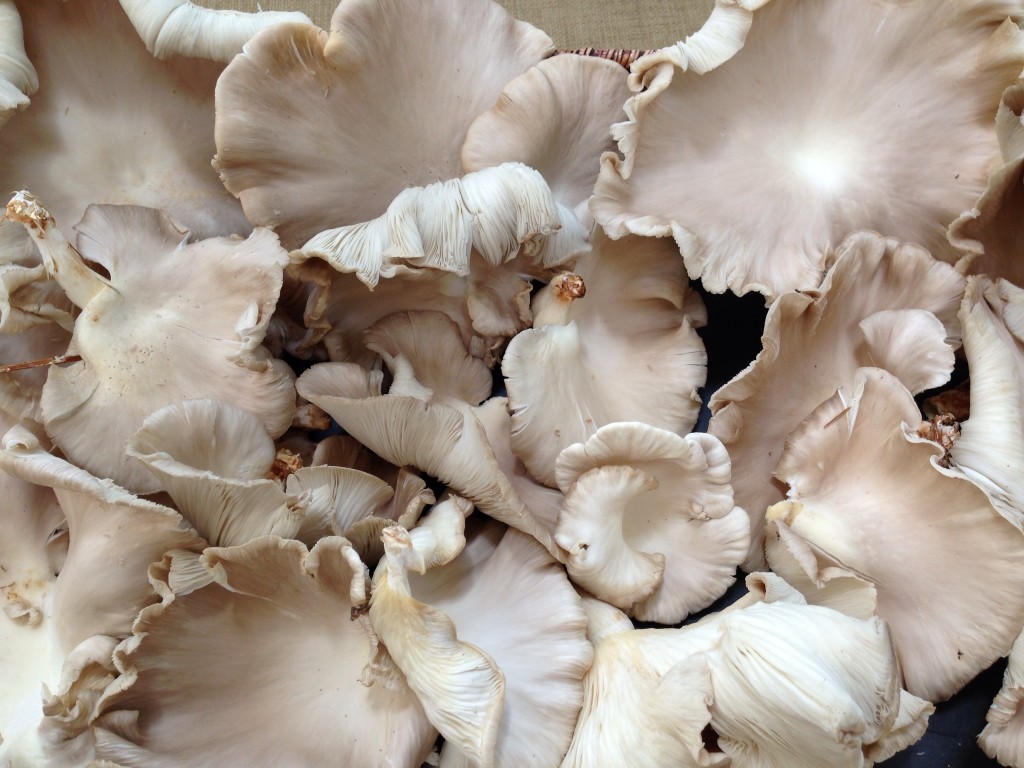
Oyster mushrooms are very delicate to handle compared to Shiitake. They must be gently placed in paper bags or bins and they don’t get moved around much after harvest because they tear easily. They also last less time than the Shiitake because they retain a lot of water in the gills underneath. Storing them in a paper bag works well to keep them cool and dry for a day or two. I used a plastic bag around the paper one to retain some of the moisture.

To clean the mushrooms, simply wipe with a damp paper towel and be sure to check the gills on these as they provide lovely hiding places for tiny insects. Some people will prefer to run them under some cool water. That will work provided you dry them off well before cooking them in oil. If you plan to grill or dehydrate your mushrooms, gently tear off the stems and leave them whole. If you intend to cook and freeze, I found that gently tearing the mushroom into pieces while holding the stem worked quite well. Try to tear the pieces about 1″ wide by 2-3″ long. Exact size is not terribly important in this process as you’ll find in a minute. And the second harvest of these from your freezer or dehydrator will allow you to make rich broths, earthy stews and soups, delicate sauces, hearty risotto or savory tarts.

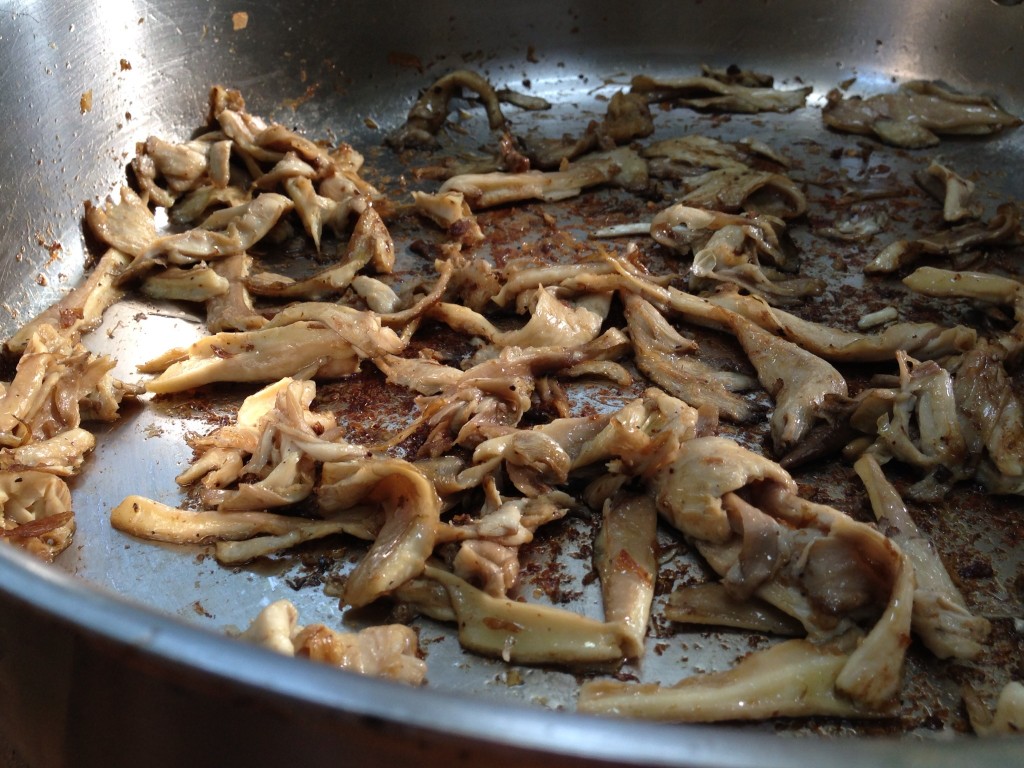
Once I worked through all of the mushrooms (a large grocery bag full), I heated up a large shallow stainless steel pan with about 2 tablespoons olive oil,  1/4 teaspoon salt & 1/8 teaspoon ground pepper. Since oyster mushrooms have a more delicate texture and flavor, I used a lighter olive oil, Himalayan salt and simple black peppercorns so I wouldn’t overpower the mushroom flavor. Once the oil was hot, I added the torn mushroom pieces to completely cover the bottom but only one layer and not terribly thick. Then I immediately tossed them around to coat them in oil and seasoning. You can use either a silicon spatula or a metal one. Keep the heat reasonably high. On a low BTU burner, you can cook it at high. On a high BTU burner, medium high should be sufficient but higher will work if you keep an eye on the process and adjust the cooking time. Take care with either spatula you choose to treat the mushrooms gently. Then I tossed them about every minute to keep them from sticking or browning too much until they were just cooked through and resembled pulled chicken in texture and color. It took less than 5 minutes to cook each batch and it was simple enough to let them cool and store them in small containers in the freezer.

If you care to save any whole oyster mushrooms to eat right away, try brushing them with olive oil, seasoning them and quickly grilling at a high temperature. Provided you cook them through, you can also freeze and use them in layers of lasagna to replace noodles or cut them to top a pizza or savory tart with fresh herbs.

For dehydrating, clean them and gently pull or cut off the stems. Leave them whole or cut them into pieces and layer on your dehydrating sheets in a single layer. Set the heat at 90-110F and leave them in until they are crack-dry which should take between 4-6 hours depending on the size and thickness of the mushrooms and how wet they are. Each variety will vary in the length of time it takes. Store them in airtight containers until you are ready to use and then hydrate them in warm water for about ten minutes before using.

While the pictures are not glamorous, you can see the difference in texture as they cook in the pan. My goal for these mushrooms is to have a replacement for chicken in a couple of dishes like chicken pot pie (I will probably continue to use shiitake in the duck pot pie & stew) to make a vegetarian version. And to have a lighter tasting mushroom to add to delicate chicken and fish dishes where shiitake mushrooms might take over the flavor. I can also envision them mixed with other mushrooms in risotto, wontons or blended into a fresh salad of baby greens. I’ve posted some recipes on Pinterest under the “Foods I Want To Try” board.


Posted in Dairy-Free, Diabetic Friendly, Freezing & Canning, General, Recipes, Seasonal Eating, Second Harvest, Summer, Vegetarian, Year-Round | Tagged , , , , , , , , , , , , , , , , , , , , | 1 Comment

Poached Eggs on Roasted Heirloom Tomato Sauce

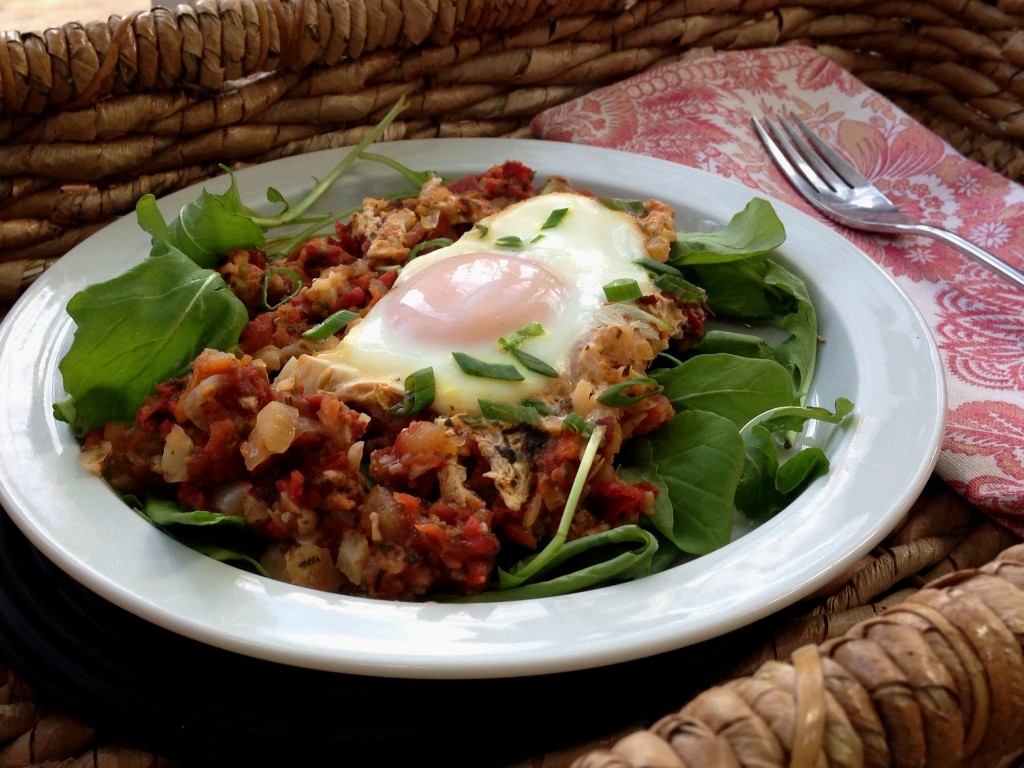
Last fall as the eggs were rolling in with cooler weather, I started looking for some different egg-based recipes that would work for any meal. I came across several recipes for Shakshuka. Wikipedia has some history about the root name and history of the dish : http://en.wikipedia.org/wiki/Shakshouka . Depending on the country, different elements are added to the base tomato sauce base. As you read through the descriptions for each country and the historical perspective, I think you’ll see why I like this recipe. By adding a variety of nuts, spicy chickpeas, local sausage, dried hot peppers (hot ground Israeli paprika is excellent), heirloom tomatoes, fresh spices like chives, thyme, or rosemary, this recipe can change with every season! And I think it’s especially good served on top of some baby arugula or fresh greens that will wilt under the tomato sauce. You will need a wide and shallow pan made from cast iron or a stainless casserole or saute pan that has a pretty tight lid for the poaching process, but I’ve also used a flat cookie sheet, weighted down, in a pinch.

Since it’s tomato season, it’s a good time to put a little extra sauce away so you can make this in just under fifteen minutes during the fall, winter and early spring. The spicy chickpeas can also be frozen after you roast a large batch. Simply thaw and reheat to get them crunchy again. Add them thawed to a recipe if you are going to blend them.

The start of this recipe is the 2011 recipe for Roasted Tomatoes .  The only difference today is the way I go about roasting tomatoes. I use unbleached parchment paper between the foil and tomatoes to try to eliminate the heavy metal exposure. The foil is simply to cut down on the clean-up time and I’ve found that the disposable aluminum pans fit perfectly into my heavy-duty 1/2 sheet pans that came from the family home. Change the parchment paper each time you put a new batch into the oven or grill because it breaks down with the liquid and heat each time.

As I’ve spoken to many of you at the market over the last couple of years, I know you don’t always have time to roast your own tomatoes, so the advice I like to pass on is to at least buy a dehydrator. Cut cherry tomatoes in half or slice plum and full-size tomatoes about 1/4″ thick.  Place on the dehydrator tray, cut side up with some dry herbs, salt & pepper sprinkled on top. As they dehydrate, the herbs will stick to the tomatoes and create a concentrated flavor profile. Store them in plastic bags with a food-grade silicon bag in each one to absorb excess moisture. Or seal them in the bag and freeze them. They easily last a year and take up very little room compared to canned or frozen sauce. Combining these with your canned tomatoes helps absorb the excess liquid quickly reducing long cooking times. It also increases the flavor more rapidly because you’ll have a blend of tomatoes instead of a generic plum-roma that is typical of most canned tomatoes.


Shakshuka: Poached Eggs on Roasted Heirloom Tomato Sauce

Ingredients

  • 6 cups roasted tomatoes with juice (homemade or canned)
  • 1/2 cup roasted or slow-cooked onion, chopped
  • 2 teaspoons roasted garlic (vary depending on what’s in your sauce)
  • 1/4 – 1/2 lb cooked sausage (sweet or hot)
  • 1/2-1 cup quick cooked crispy Shiitake mushrooms with smoked salt & smoked peppercorns- optional alternative to meat
  • 2-3 tablespoon chopped green onion
  • 6 pullet eggs – or 4 large eggs (pullets cook faster since they are smaller)
  • 1/4 teaspoon smoked hot paprika – light dusting for the poached eggs
  • optional items include chopped hot peppers (1-3), up to 1 teaspoon cumin, 1/2 cup roasted spicy chickpeas, substitute sweet paprika for hot, 1/2 cup chopped celery, 1/4 cup feta cheese, 1/4 cup finely chopped parsley or chives

Preparation

  • If you don’t have pre-cooked onion, start by cooking about one cup of chopped sweet onion in some olive oil on low heat until it’s translucent. You can add the chopped celery at the same time.
  • Add the tomato sauce, garlic, mushrooms, chickpeas, and/or sausage to the onion and celery mixture and cook until it’s simmering.
  • Stir in the green onion.
  • Quickly break the eggs into the tomato sauce without breaking the yolks (you can use a separate bowl).
  • Sprinkle with paprika.
  • Cover and cook with the tomatoes simmering on medium-high for about 4-5 minutes until the egg yolks are just set.
  • The whites will still look uncooked, but they continue to cook even as you serve the dish.
  • Serve over grilled or toasted bread with a healthy serving of the tomato base.


Posted in Breakfast, Dairy-Free, Diabetic Friendly, Dinner, Egg, Fall, General, Gluten-Free, Recipes, Seasonal Eating, Second Harvest, Spring | Tagged , , , , , , , , , , , , , , , , , , , , , , , , | Leave a comment

Seasonal Sandwiches Using Local Ingredients

I’ve been meaning to do a post on sandwiches for several months. They are probably one of my favorite categories of foods. Almost all cultures have some sort of sandwich and if you are not into bread, you can use any number of vegetable leaves to hold your favorite ingredients any time of the year.

For busy families, sandwiches are a lifesaver meal, no matter what time of day. In less than thirty minutes anyone can create a fabulous sandwich using local farm ingredients and locally baked breads. And many of our NC farms are now producing nitrate-free “deli meats” made from their own organic pasture-raised animals. These meats provide a short-cut for many recipes from sandwiches to stews, soups, quiche or casseroles.

Just recently I conducted a Sandwich Class at the Durham Farmers’ Market just for kids. The kids learned how to grill summer vegetables and put them together on a Panini  using bread and cheese from the market. While we created vegetarian sandwiches, any of our combinations could have included either left-over meats from a prior meal or some of the deli meats from local farms. Each student made their own combinations based on the food that was available from the market that day and what they wanted to try. We “pressed” our sandwiches into cast iron pans to make Panini sandwiches and we all shared the different combinations with each other. Class ended with parents asking what vendors had the vegetables, bread and cheese that we used in class!

In this “recipe” I wanted to highlight a couple of local farm and bakery items that can make sandwiches super simple for you to pull together. Using seasonal ingredients, a simple egg and ham sandwich can be made with egg, fresh herbs, local cheese, green onions and wilted spring greens or shaved asparagus in the early spring. When summer arrives use egg, bacon and roasted tomato or peppers and switch back to egg, ham roast, grilled eggplant or squash. As winter brings on the chill, switch to eggs rolled up in naan with herbs, lamb, hard local cheese, onions and winter greens with dehydrated tomatoes. All of those combinations can be modified with changes to the local bread or the way you cook the egg, or a decision to go with roasted, sautéed, grilled or raw vegetables. And then you can choose to grill, press, bake or serve at room temperature any of the combinations. Croissants, loaf bread, naan, pita, focaccia, and rolls can be heated, grilled, baked or used cold and each will impart a different flavor on the sandwich.

If you don’t choose to eat gluten-bread, several vendors across the state offer gluten-free bread at different farmers’ markets. And there’s the option of using a large piece of kale, cabbage, lettuce, turnip or beet leaf to wrap up your sandwich as well. And remember that you can roast, saute or grill many vegetables and save them in your freezer to use on your sandwiches throughout the year. Second harvests can be the best of all since the hard work of preparation and cooking is mostly complete.

Here are a few photos with notes to get your started and I’ll add more throughout the year. Send suggestions of your favorites!


Grilled Vegetable Panini Class at the Durham Farmers’ Market


Coon Rock Farm Roast Beef with roasted peppers, slow-cooked onions, spring greens and local cheese


Raleigh Downtown Farmers’ Market cooking demonstration using La Farm bread with sautéed organically grown vegetables from local farms.


Loaf bread filled with fresh greens, heirloom tomatoes and local pastrami


Local pita with leftover ham roast from Cohen Farm,  summer squash, zucchini & fresh heirloom tomatoes


Local croissant filled with deli ham from Coon Rock farm, dehydrated cherry tomatoes, fresh greens and local cheese


Grilled Cheese with sautéed Winter Greens at Western Wake Farmers Market


French Toast Sandwich with ham, roasted peppers and fresh-cut greens

Posted in Breakfast, Dinner, General, Lunch, Recipes, Seasonal Eating, Second Harvest, Year-Round | Tagged , , , , , , , , , , , , , , , , , , , , , | Leave a comment

Blueberry & White Chocolate Bread Pudding

La Farm Bakery always has samples of their wonderful bread each week at the Raleigh Downtown Farmers’ market. This week I noticed  White Chocolate Baguette samples and got coaxed into trying them. These would make an excellent breakfast treat as French toast paired with fresh fruit and local honey.  But then I thought about the texture and decided to try to make individual bread puddings that I could use for brunch on Sunday.

It’s always nice when a recipe comes to together quickly and works the way you expect. This one is fairly forgiving and flexible regarding the amount of egg and fruit. I can imagine it would work well with spring and summer fruit like strawberries, blackberries, raspberries and peaches and both pecans and almonds. Make sure to select a light honey that highlights the summer fruit and white chocolate well.


Blueberry & White Chocolate Bread Pudding with Local Honey & Pecans

Ingredients

  • 2 La Farm Bakery white chocolate baguette (8 oz)
  • 2 large eggs (3 pullet eggs)
  • 1/4 cup half / half (whole milk or cream will work)
  • 1/4 cup honey (Just Bee Apiary – Carrboro variety which is light)
  • 1/4 teaspoon nutmeg
  • 1/4 teaspoon cinnamon
  • 2 tablespoons butter, melted
  • 1/16 teaspoon Himalayan salt
  • 1/4 cup white chocolate chips (Available Products)
  • 3/4 cup fresh blueberries (4 oz)
  • 1/4 cup toasted pecans, rough chop
  • Large Tulip Baking Cups (2 x 3.5″)
  • Tin for large/deep muffins

Preparation

  • Beat the eggs with the half & half, nutmeg, cinnamon and honey in a large bowl.
  • Cube the baguettes roughly into 1″ pieces and add to the egg mixture.
  • Toss the mixture together until the bread is well coated. Let sit for about 5-10 minutes. Most of the liquid should be absorbed.
  • While the bread is sitting, melt the butter and add the salt. Using a pastry brush, lightly coat the inside of the paper parchment cups.
  • Gently push pieces of bread into each of 4 parchment cups to form a base. Add a few blueberries to each cup and about 3 white chocolate chips. Add another layer of bread, blueberries and white chocolate chips. Repeat the process one last time and top with a few chopped toasted pecans.
  • Use any remaining egg mixture to each of the four cups.
  • Cover the parchment cups with a layer of parchment paper to keep from burning.
  • Bake at 350F for 25 – 30 minutes.

Notes

Other locally baked breads that are fairly dense and a little sweet will work with this recipe like sweet rolls or sour dough based breads. Bagels may need to be soaked for an additional 5-10 minutes to absorb a little more egg mixture and would not be a first choice. Croissants will require less time or they will fall apart when you go to push them into the parchment cups. Bread that is more crumbly like Banana will not work in this recipe.


Posted in Breakfast, Dessert, General, Recipes, Seasonal Eating, Snack, Summer | Tagged , , , , , , , , , , , , , , , , , | Leave a comment

Cornmeal Cakes with Fresh Corn & Heirloom Okra

Hey, it’s summer! Okra thrives like eggplant in this weather. With beautiful colors ranging from deep burgundy red to light pine blue-green, okra can really add color to your plate. It’s known as “Lady’s Fingers” in some countries, although some that show up at the market are not delicate like a lady’s finger at all! In fact, one of the okra I picked from the Brody Discovery Garden at Duke last week was easily 9 inches long and an inch or so thick.

Okra is also quite healthy. There are lots of vitamin C, calcium, potassium, folic acid and antioxidants. Unfortunately, it’s also well-known for the slimy texture once cut. But that “slime” is an excellent thickening agent in Brunswick Stew, Seafood Gumbo, or these gluten-free Cornmeal Cakes. Okra can be brushed with olive oil, salt & pepper and grilled whole in just a few minutes and eaten right away or sliced and added to other recipes for some additional flavor. Or think about slicing it thinly, rolling it in seasoned organic cornmeal and cooking it  in olive oil using a cast iron pan. I’m fond of this last method when there’s a little hot smoked paprika in the cornmeal to give it some color and heat.

Any way you choose, any color you choose, any size you choose, it’s all good for you, so enjoy experimenting. This recipe is slightly different from the one used at the Sarah P. Duke Gardens during the Durham Gardeners’ Fair. To replicate the one from the Garden, replace the buttermilk with additional filtered water  and serve them roasted red peppers, pepper jelly and fresh local goat cheese.


Cornmeal Cakes with Fresh Corn & Heirloom Okra

Ingredients

  • 2 cups local organic cornmeal
  • 2 teaspoons baking powder (aluminum-free)
  • 1 teaspoon Himalayan Sea Salt
  • 1/8 teaspoon fresh ground pepper
  • 1 egg, lightly beaten (pasture raised)
  • 1/4 – 1/2  cup filtered water
  • 3/4 cup organic buttermilk (without added thickening agents)
  • 3/4 cup of thinly sliced fresh okra (1/16″ – 1/8″)
  • 1/2 cup of freshly cut corn off the cob (scrape the cob for the corn starch)


Preparation

  • Whisk together the cornmeal, baking powder, salt and pepper in a large bowl.
  • In a second bowl beat the egg, buttermilk and water and then blend together with the dry ingredients
  • Gently fold in the corn and okra to the cornmeal mix. The batter will be thick and will continue to thicken from the okra. Add water or buttermilk as necessary to thin it as the batter is used.


Posted in Appetizer, Dairy-Free, General, Gluten-Free, Recipes, Sides, Summer | Tagged , , , , , , , , , , , , , , , , | 1 Comment

Cantaloupe & Strawberry Smoothie

It seems like the rain has been going on forever. I remember about 25 years ago we spent an entire year in Raleigh with rain nearly every day. This memory stayed with me because there was a programmer from Texas at work that moved here for her job and after a year working for our company she moved back to Texas citing the horrible wet and humid weather. She liked to be outdoors and just couldn’t stand the wet, muddy mess that clay creates around here. I’d have to agree with her this year. I’m just a little tired of ticks and mosquitoes. Generally speaking, it’s been a long year and we’re only a little over half through.

The result of so much rain on the fruit crops throughout our state has been hard.  Strawberries rotted on their stems in the spring; melons are plumping up and splitting before they ripen; blackberries and raspberries have been driven to the ground by torrential downpours. Blueberries are about the only fruit that seems to be holding on pretty well. The loss to local farms is staggering because fruit can be a good cash crop for many farms.

With increasing summer heat and humidity, smoothies are fun, colorful and cooling. There’s a couple of ways to increase their flavor even if the fruit isn’t as plentiful or potent.   They don’t require expert measuring so you can use what you have in similar quantities and change the flavor with different liquids, specific honey flavors, or by dehydrating the fruit and adding nuts or coconut flakes.


Cantaloupe & Strawberry Smoothie

Ingredients

  • 1 cup cut up ripe cantaloupe (fresh or frozen)
  • 1/2 cup cut up strawberries (fresh, frozen, or fewer dehydrated chips)
  • 1/2 – 3/4 cup cut up banana (fresh, frozen, or fewer dehydrated chips)
  • 1 tablespoon of your favorite honey (lighter, sweeter honey works well with the cantaloupe)
  • 1/2 cup coconut water
  • 2 tablespoons organic coconut flakes


Preparation

Add the softest fruit and coconut water (or other liquid) into the blend first along with honey and coconut flakes. Then add the frozen or dehydrated fruit chips into the blender and mix all of the ingredients on low until all of the frozen fruit is broken into a slush; which should take about a minute. Move the blender to a higher speed for another minute until everything is smooth. Add extra coconut water if you are primarily using dehydrated fruit.


Posted in Drinks, General, Recipes, Seasonal Eating, Second Harvest, Summer, Vegetarian | Tagged , , , , , , , , , , , , , , , , , , | Leave a comment

Roasted Heirloom Beets, Local Chevre & Fresh Thyme

I have to credit this idea to Chef Sarig at Zely & Ritz in Raleigh. Early in the spring he served an appetizer of beautifully stacked pickled beets with layers of goat cheese. It was such a delightful sight, it was hard to eat, but we managed, somehow.

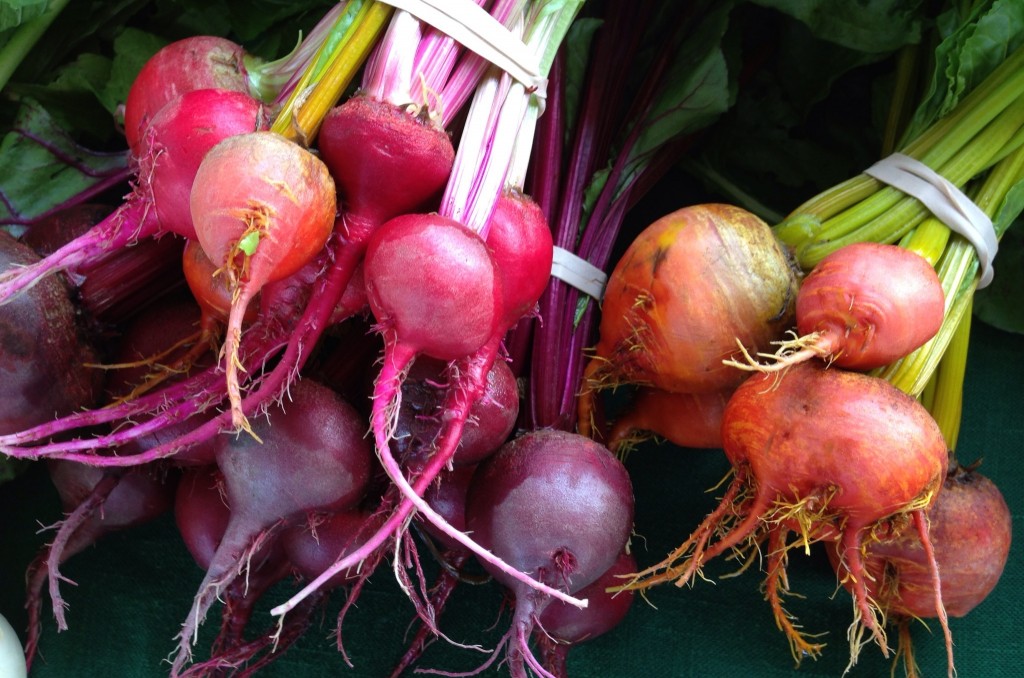
Not being terribly patient, I didn’t think I could demonstrate the pretty little stacks at the farmers’ market very well, so I decided to adapt Chef Sarig’s idea and utilize a glass bowl that would show off the beauty of colored heirloom beets ( http://sustainableseedco.com/organic-heirloom-beet-seeds/  ) and still preserve a lot of the flavor. It’s probably possible to use a mandolin and thinly shave the beets for the layers as well. I’ll try that sometime this fall and make some notes here for you.

The advantages of making this appetizer in a bowl instead of individual stacks is that it can be prepared in advance and it travels well.  Use  homemade crackers, toasted pita or warm bread with this dish and it’s a showstopper that gets gobbled up quickly even when the guests profess to hate beets. The beets can be roasted, pureed and stored in the freezer for months, allowing this recipe to be made through many seasons in a matter of a few minutes once they are thawed.


Roasted Heirloom  Beets, Local Chevre & Fresh Garden Herbs

Ingredients

For the Beet Layer:

For the Chevre Layer:

Preparation

  • Blend the beets together with the salt, vinegar and honey until they are fairly smooth. If you have different color beets, keep them separate so you can layer them when you assemble the spread.
  • Gently blend the goat cheese, fresh thyme, salt and pepper together.
  • Using a small glass dish, add about 1/4 – 1/3 of the goat cheese in the bottom. If you dish tapers smaller at the bottom, layer less so your layers appear even as you continue. Then add 1/3 of the beets (or the darkest color of beets if you have several types).
  • Repeat this process with the darker colored beets at the bottom of the layers and the lighter colored beets progressively higher finishing with beets at the very top.
  • As the dish sits, the beet juice will drain through each of the layers of goat cheese created a rainbow of colors from light yellow-orange through pink and red-purple. Allow your guests to use a small spreading knife to dig into the mixture and the colors will spread even more as it’s eaten.
Posted in Appetizer, Fall, General, Recipes, Seasonal Eating, Second Harvest, Spring | Tagged , , , , , , , , , , , , , , | Leave a comment

Very Berry Beet Smoothie

Spring is just around the corner. Some in the South say it’s already here with the arrival of the Cherry Tree blossoms, daffodils, tulips and periwinkle flowers. I’m not so sure since I’m still wearing scarves and mittens. But I do know that  one of my favorite things to drink once the weather turns warm for  breakfast and late afternoon snacks are fruit based smoothies. You can put some greens in these, but just about a handful is really all I like so the color stays bright to announce the warming weather.

Here’s two versions of this recipe but feel free to edit and add whatever fruit you like. You really can’t mess this up. The main goal is to get some fresh fruit, veggies, a little protein, a few greens and some good electrolytes into your body to begin the day or pick you up when it’s really hot outside.

Both of these recipes rely on you roasting beets plain, in their skin, then skinning them, slicing and freezing them to have year round. Beets are grown twice a year in the spring and fall here in the South and they are plentiful and inexpensive. You can eat them raw or cooked. I have not tried this recipe with raw beets yet, but I’ll do that later in the week and update the notes. Feel free to use the golden or red beets in this recipe to change the color.

The first version uses organic fruit based kefir, the second uses plain organic kefir which is 99% lactose free and with the probiotics it sits well on your tummy. The second version also allows you to customize the flavor a bit using any honey of your choice. For the test this week, I used Basswood Honey from Blue Ridge Apiaries which has a mild mint undertone. All honey has a different flavor depending on where the bees have been foraging and you can take advantage of the differences in recipes. I written about this before and want to note that I normally keep around a dozen different varieties from different producers around the state because the flavor varies so much in the different regions. Like maple syrup, you’ll find that the way a producer manages their hives and the honey collection process can change the flavor significantly so taste before you buy and ask questions. If a hive is located near or on a farm using a lot of chemicals, that gets transferred into the honey. If a hive is located near GMO crops, that could cause the hive to be much less healthy and produce an inferior product as the hive matures.  So ask questions and select good quality honey when you’re out shopping.


Berry Beet Smoothie Version 1

Ingredients

  • 1/4 – 1/3 cup frozen beets (roasted plain and peeled)
  • 1/2 cup frozen very ripe banana slices
  • 1/2 cup frozen raspberries, blackberries or blueberries
  • 1/2 – 1 teaspoon finely chopped candied ginger (mine is candied in maple syrup)
  • 3/4 cup plain coconut water (coconut water can be frozen in ice-cube trays)
  • 1/2 – 3/4 cup Strawberry, Blackberry or Raspberry Organic Kefir
  • 1 handful of tender baby greens with little stem (I like spinach, chard & bok choy)

Preparation

  • Blend until smooth.
  • Yields enough for one very generous smoothie or two kid-sized portions.


Berry Beet Smoothie Version 2

Ingredients

  • 1/4 – 1/3 cup frozen beets  (roasted plain and peeled)
  • 1/2 cup blackberries, raspberries or blueberries
  • 1/2-3/4 cup very ripe bananas (a little more for sweetness in this recipe)
  • 1/2 teaspoon finely chopped candied ginger (you can candy your own with maple syrup or sugar)
  • 1 cup plain coconut water (can be frozen in ice-cube trays)
  • 1 cup plain organic kefir (which is 99% lactose free)
  • 2 – 3 teaspoons honey (depending on how sweet you like it)
  • 1 handful of tender baby greens (very little stem)

Preparation

  • Blend until smooth.
  • Yields enough for two very generous adult portions.


Notes

Maybe peaches, golden raspberries, golden beets and bananas would make a lovely yellow smoothie.

Posted in Drinks, Freezing & Canning, General, Recipes, Seasonal Eating, Snack, Spring, Summer | Tagged , , , , , , , , , , , , , , , , , , , , , , , | Leave a comment

Roasted Cauliflower & Wilted Spinach Cream Soup

It’s St. Pattie’s Day so I thought I would post this “green” recipe that I’ve been sitting on for a couple of weeks, trying to get a better photograph. The green is hard to capture and the texture is a little less refined than what I might ordinarily put in vintage china. But it’s spring and I’ve been looking for an excuse to pull out the floral china and put aside the rustic fall colors.

This recipe was inspired by a bowl of soup that I had at Venable Bistro in Carrboro a few weeks back. While the entire meal was full of wonderful surprise combinations from a chef that supports the local sustainable farming community, this simple soup struck me as the highlight.  The unusual combination of vegetables creates a creamy and slightly sweet soup. After reviewing several recipes on the web, it became clear that this was a soup I wanted to share because it uses the best of both fall and spring veggies that come to the farmers’ market simultaneously and it’s not difficult to put together at home. You can store the base if you happen to have a bumper crop of cauliflower and/or spinach in either season. You can also use previously cooked ingredients from your freezer, which is exactly what I did when I was testing the recipe.  Now, I’ll be the first to admit, that this recipe is quite basic and not as complex as the one at Venable Bistro, but here’s your opportunity to experiment and make this base recipe your own over time with additional spices or changes to your stock. I’ll add notes to the base recipe as I make it a few more times, so be sure to check back.


Roasted Cauliflower & Wilted Spinach Cream Soup

Ingredients

  • 1 lb of roasted cauliflower (in olive oil)
  • 1 teaspoon roasted garlic clove (more if you like it)
  • 1/2 – 3/4 cup sautéed onion & celery (in olive oil)
  • 2 cups veggie or chicken broth (up to 1 cup more if you like thinner soup)
  • 2 oz baby spinach
  • 1 teaspoon Chardonnay Oak Barrel Smoked Salt
  • 1/2 teaspoon Himalayan salt
  • up to 1/4 teaspoon ground Mesquite & Apple Wood Smoked Peppercorns
  • Half/Half or cream (1/8 cup for every cup of vegetable & broth puree)


Preparation

  • Warm the broth, onion, celery and cauliflower in a pot until boiling.
  • Add the baby spinach and cook just a minute or two until wilted. The color of the soup will not be as bright if you over-cook the spinach.
  • Puree everything together in a blender or food processor, adding the two different salts & pepper at that point. It’s possible to stop at this point and freeze or refrigerate the base.
  • Add 1/8-1/4 cup of half/half cream to the soup as you warm it to serve. If you use whipping cream, it will be more sweet and thick and you could add some additional broth to thin it back again.
  • If you have frozen steamed green zucchini, you can also add up to 1/4 cup of this to the soup to add more flavor but it’s not a necessity.


Notes

I believe you might be able to substitute ground raw sprouted cashew butter for the cream if you decide to make this totally vegan. That would add the slight sweetness and cashews are a natural combination with cauliflower in many dishes. You’ll probably need to puree the cashew butter with the vegetable broth before adding it to the soup so you get even distribution.

My chicken stock is made using celery, celery leaves, rosemary, thyme, oregano, bay leaf, onion, garlic, salt & pepper, sometimes carrot & turnips are also added if they happen to be laying around.

Posted in Appetizer, Dinner, Fall, Freezing & Canning, General, Gluten-Free, Lunch, Nut-Free, Recipes, Seasonal Eating, Soup, Spring | Tagged , , , , , , , , , , , , , , , , , , , | Leave a comment